Flutter Plugin
Getting Started
Latest release:  (Changelog)
Requirements
Device Requirement


Resources

Integration
SDK Integration Guide
It’s always recommended to use the updated version
Step 1
Run this command: dart pub add shuftipro_onsite_sdk with dart or flutter pub add shuftipro_onsite_sdk with flutter
 OR
ORAdd dependency in pubspec.yaml as
dependencies:
  shuftipro_onsite_sdk: ^1.0.15
Step 2
Go to project > android > build.gradle file and add the following
allprojects {
    repositories {
        google()
        mavenCentral()
        maven { url 'https://jitpack.io' } // add this line
    }
}
Step 3
Go to project > android > app > build.gradle file and add the following
android {
    //Rest of your code
    dataBinding {
        enabled = true
    }
}
Step 4
import 'package:shuftipro_onsite_sdk/shuftipro_onsite_sdk.dart' in your class to send the request to Shufti's SDK.
Step 5
For iOS, navigate to the iOS folder and run the commands pod install and pod update to fetch the latest dependencies.
Step 6
For iOS, Info.plist must contain Privacy - Camera Usage Description with corresponding explanation to end-user about how the app will use these permissions
Basic Usage
Make sure you have obtained authorization credentials before proceeding. You can get client id or secret key and generate access token like this.
Authorization
The following code snippet shows how to use the access token in auth object.
Access Token
Make auth object using access token
Map<String,Object> authObject = {
          "auth_type": "access_token",
          "access_token": accessToken,
        };
Or
Encrypted ID
If you do not want to use the access token, you can pass an empty auth object and use the encrypted ID instead.
Make an empty auth object
Map<String,Object> authObject = {
          "auth_type": "",
          "access_token": "",
        };
Then add the encrypted_id in the Request Object.
Map<String, Object> createdPayload = {
        "encrypted_id": "LNXqWIXXXXXXXXXXXXXXXXXXXCrJKf"
      };
The encrypted_id is generated from the verification_url returned by the Shufti API response.
{
    "reference": "XXXXx",
    "event": "request.pending",
    "verification_url": "https://app.shuftipro.com/verification/process/LNXqWIXXXXXXXXXXXXXXXXXXXCrJKf"
}
In the above example, the encrypted ID is the value after /process/ in the verification_url.
The encrypted_id value is of type String.
Configuration
The Shufti’s mobile SDKs can be configured on the basis of parameters provided in the config object. The details of parameters can be found here
Map<String,Object> configObject = {
      "base_url":  "api.shuftipro.com",
      "consent_age":  16,
      "active_liveness":  true
    };
Request Object
This object contains the service objects and their settings through which the merchant wants to verify end users. Complete details of service objects and their parameters can be foundhere
Map<String, Object> createdPayload = {
        "country": "",
        "reference": "12345678",
        "language": "",
        "email": "",
        "verification_mode": "image_only",
        "show_results": 1,
        "allow_warnings": "1",
        "face": {},
        "document": {
          "supported_types": [
            "passport",
            "id_card",
            "driving_license",
            "credit_or_debit_card",
          ],
          /* Keep name, dob, document_number, expiry_date, issue_date empty for with-OCR request*/

          "name": {
            "first_name": "John",
            "last_name": "Johsan",
            "middle_name": "Livone",
          },
          "dob": "",
          "document_number": "19901112",
          "expiry_date": "1996-11-12",
          "issue_date": "1990-11-12",
          "gender": "M",
          "backside_proof_required": "1",
        }
      };
Initialisation
Shufti's mobile SDK can be initialized by using the following method and passing auth, config and request objects as the parameters.
ShuftiproSdk.sendRequest(authObject, createdPayload, configObject);
Callbacks
The SDK receives callback events as result, whether the verification journey is completed or left mid-way. The call back is received in following function
var response = await ShuftiproSdk.sendRequest(authObject, createdPayload, configObject);
The complete list of callback events can be foundhere
Obfuscation
The Shufti Flutter SDK already includes the required ProGuard rules for android builds, so there's no need to add them separately.
In Android folder, Make sure you have disabled R8 full mode in the gradle.properties file in release mode.
android.enableR8.fullMode=false
Customisation
Shufti supports a set of customisation options that will influence the appearance of the mobile SDK.
UI Customisation
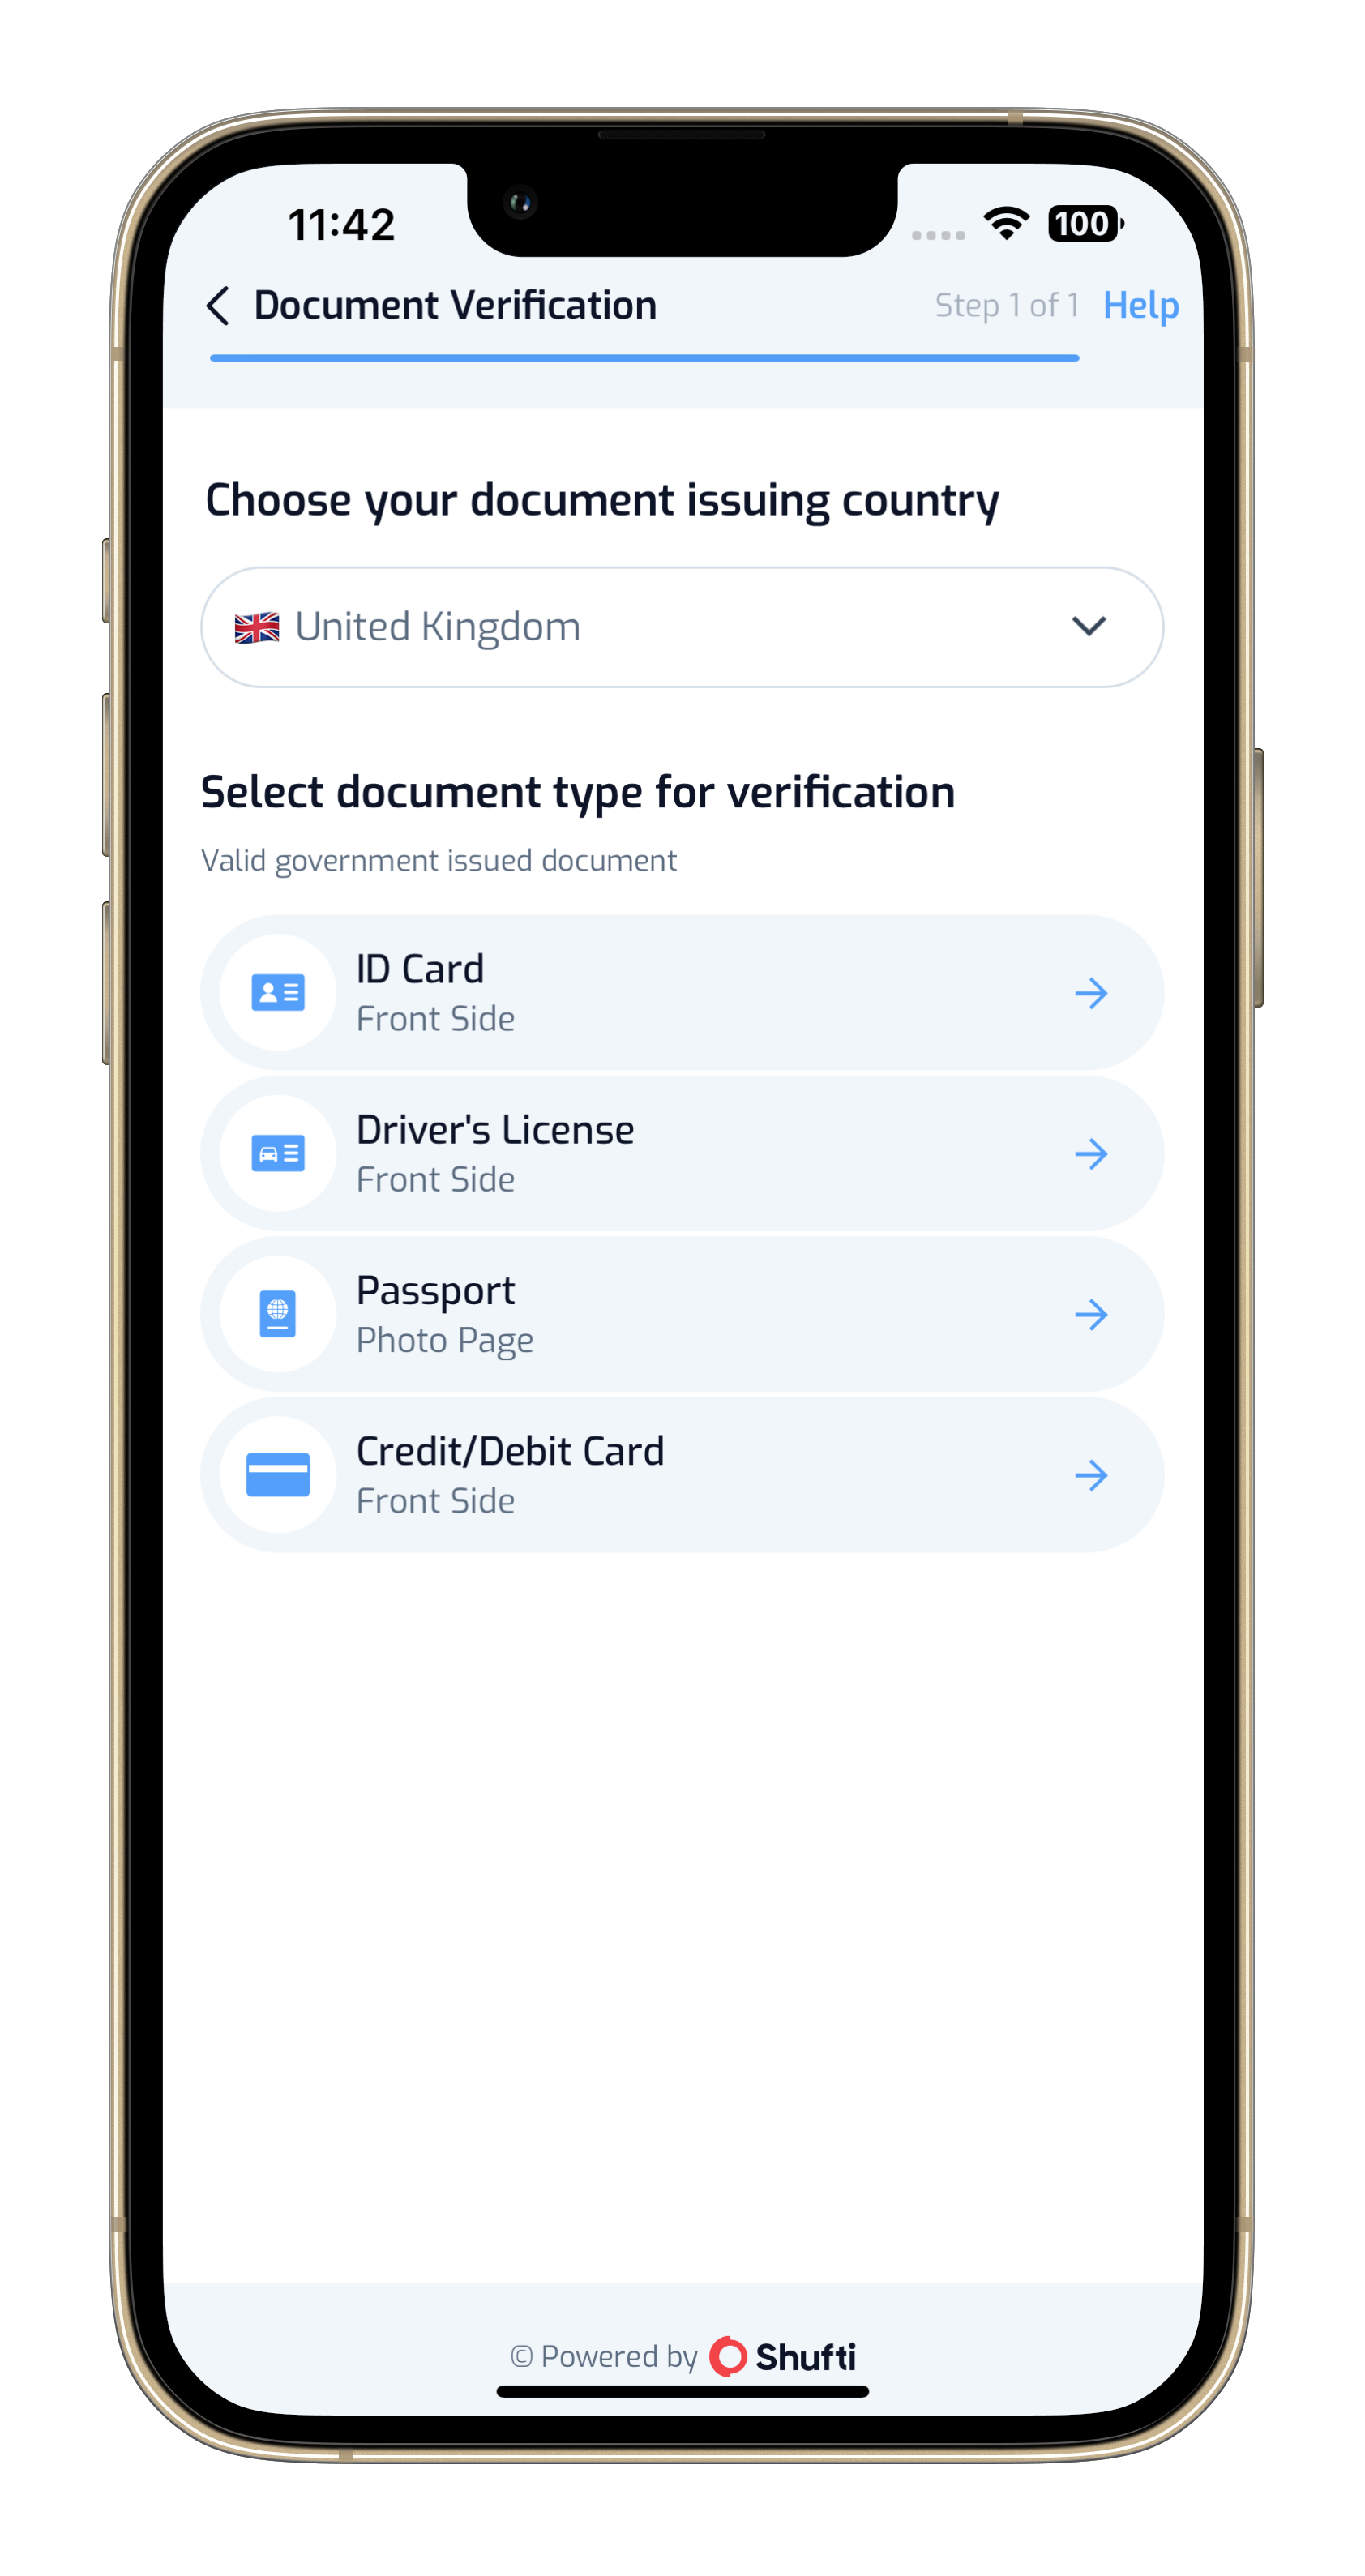
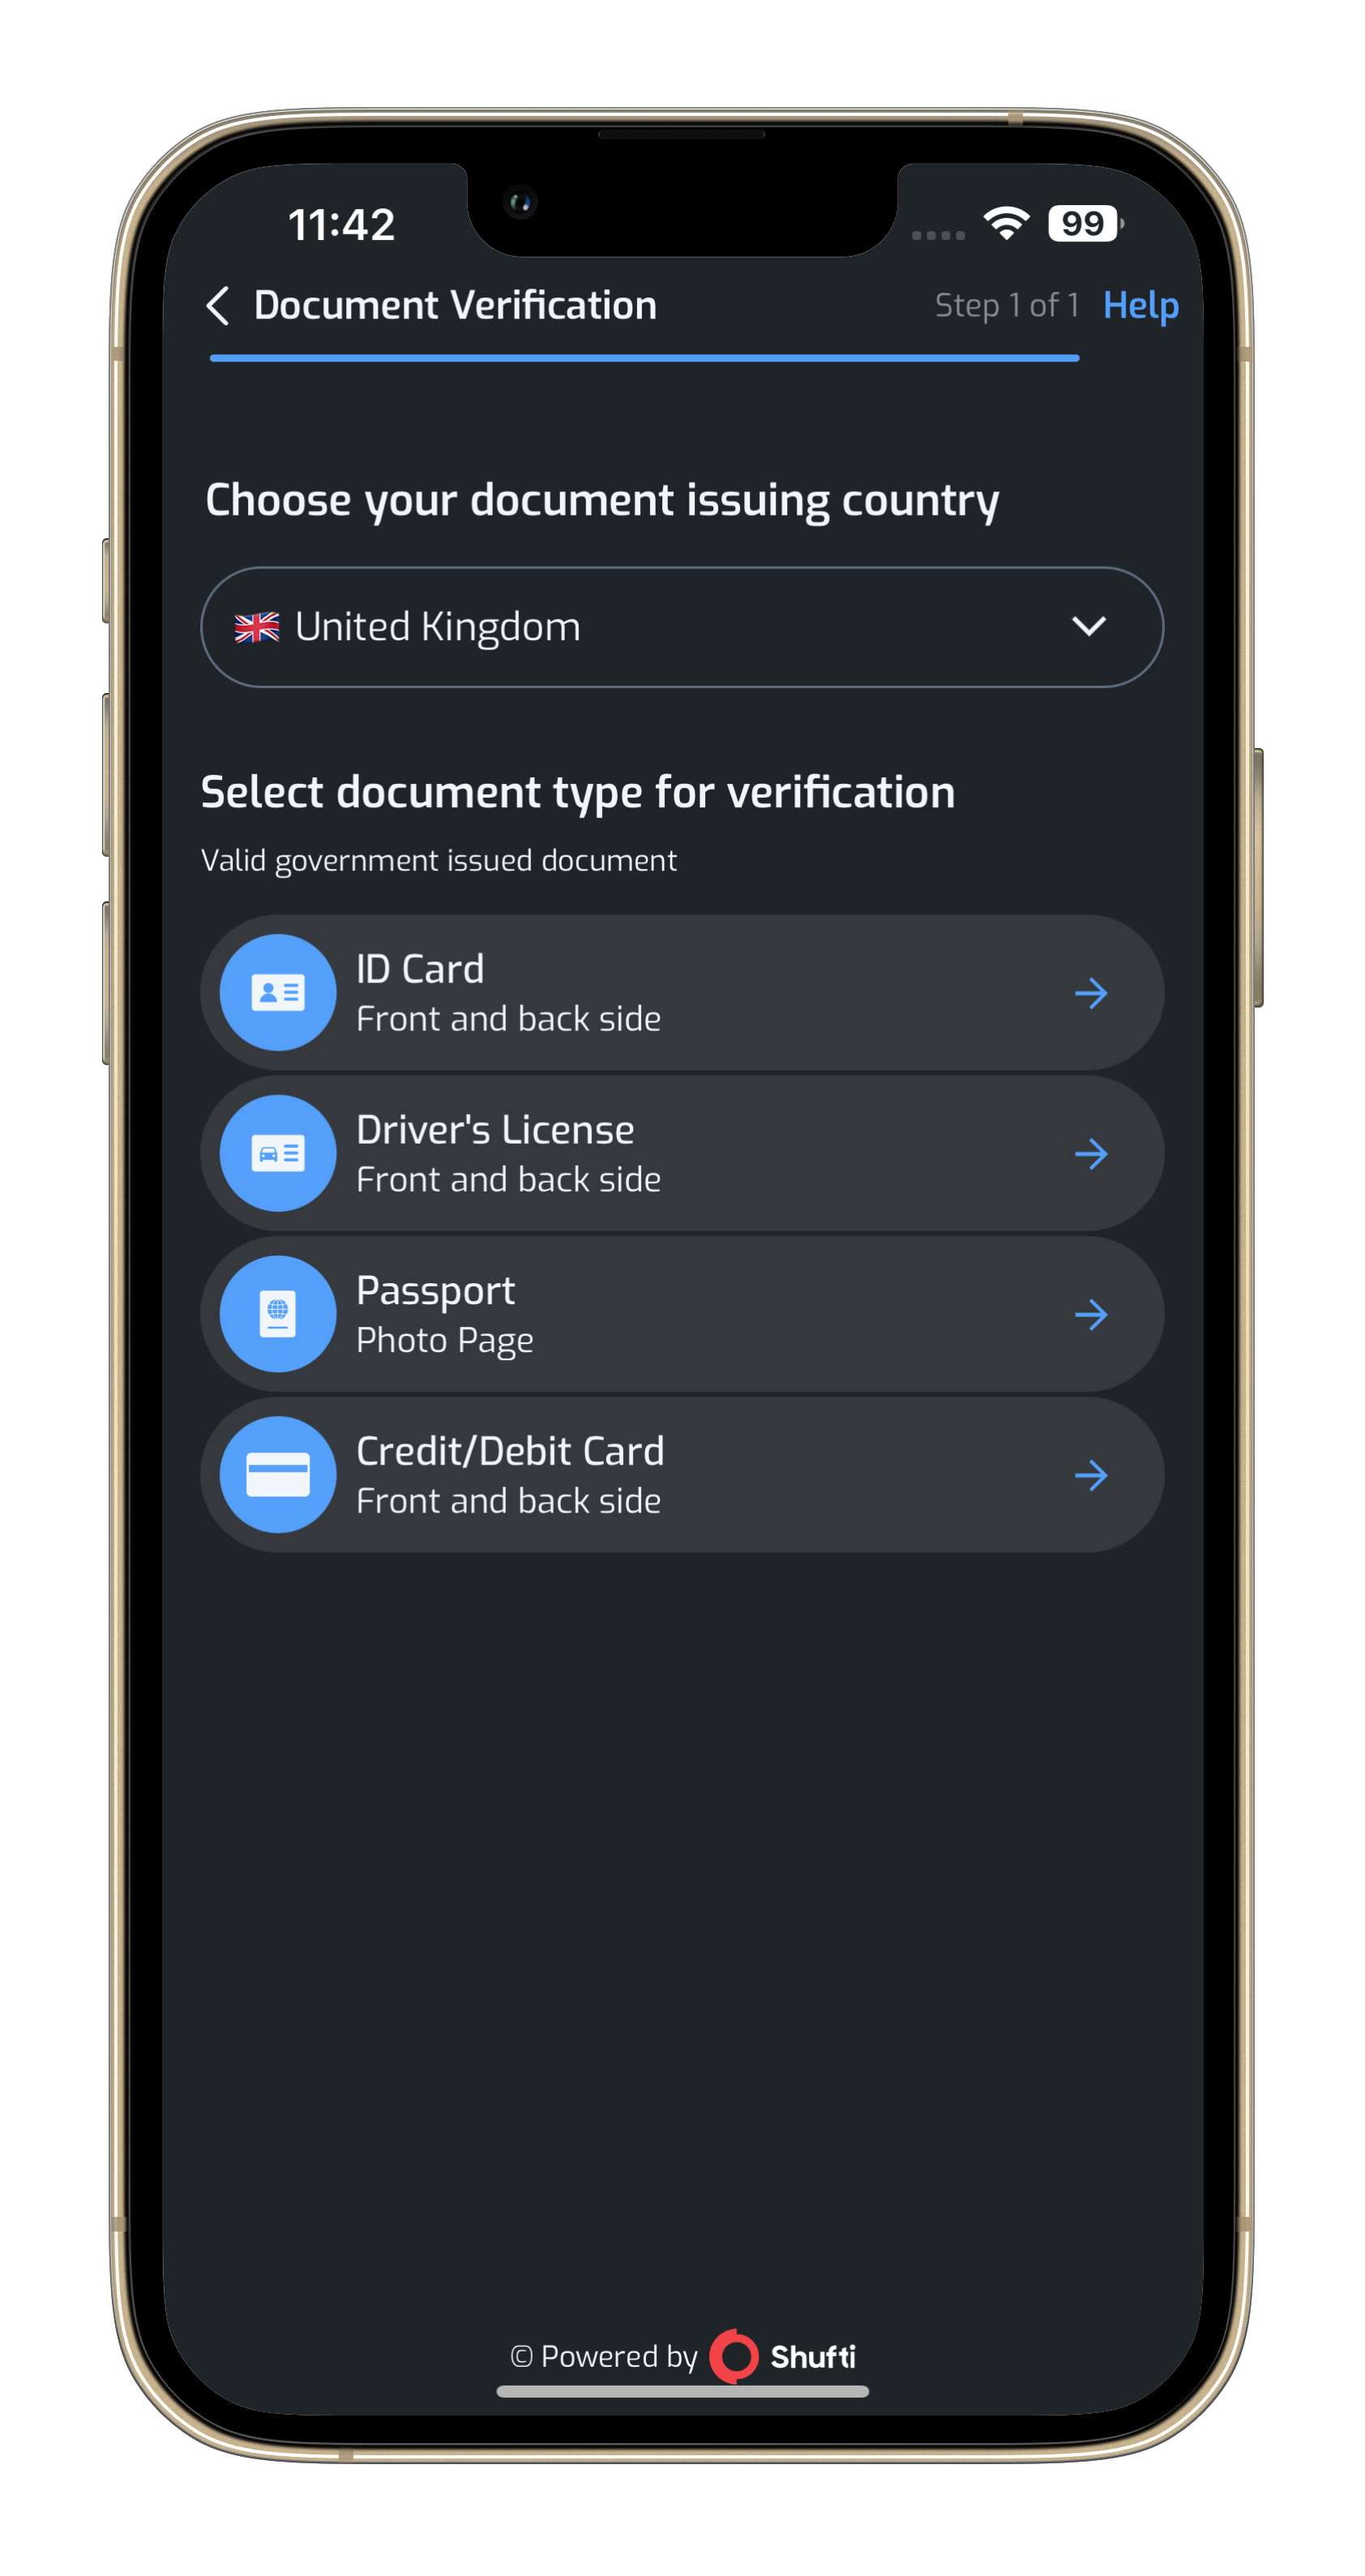
To customize the color scheme of the entire Shufti mobile SDK, including the text and background colors of widgets, update the theme settings in the Backoffice theme customization section and use the keys below for detailed modifications.
You can customize the SDK theme to match your application, choosing from Light (default), Dark, or a fully customized theme.
Light Theme
Dark Theme
Custom Theme
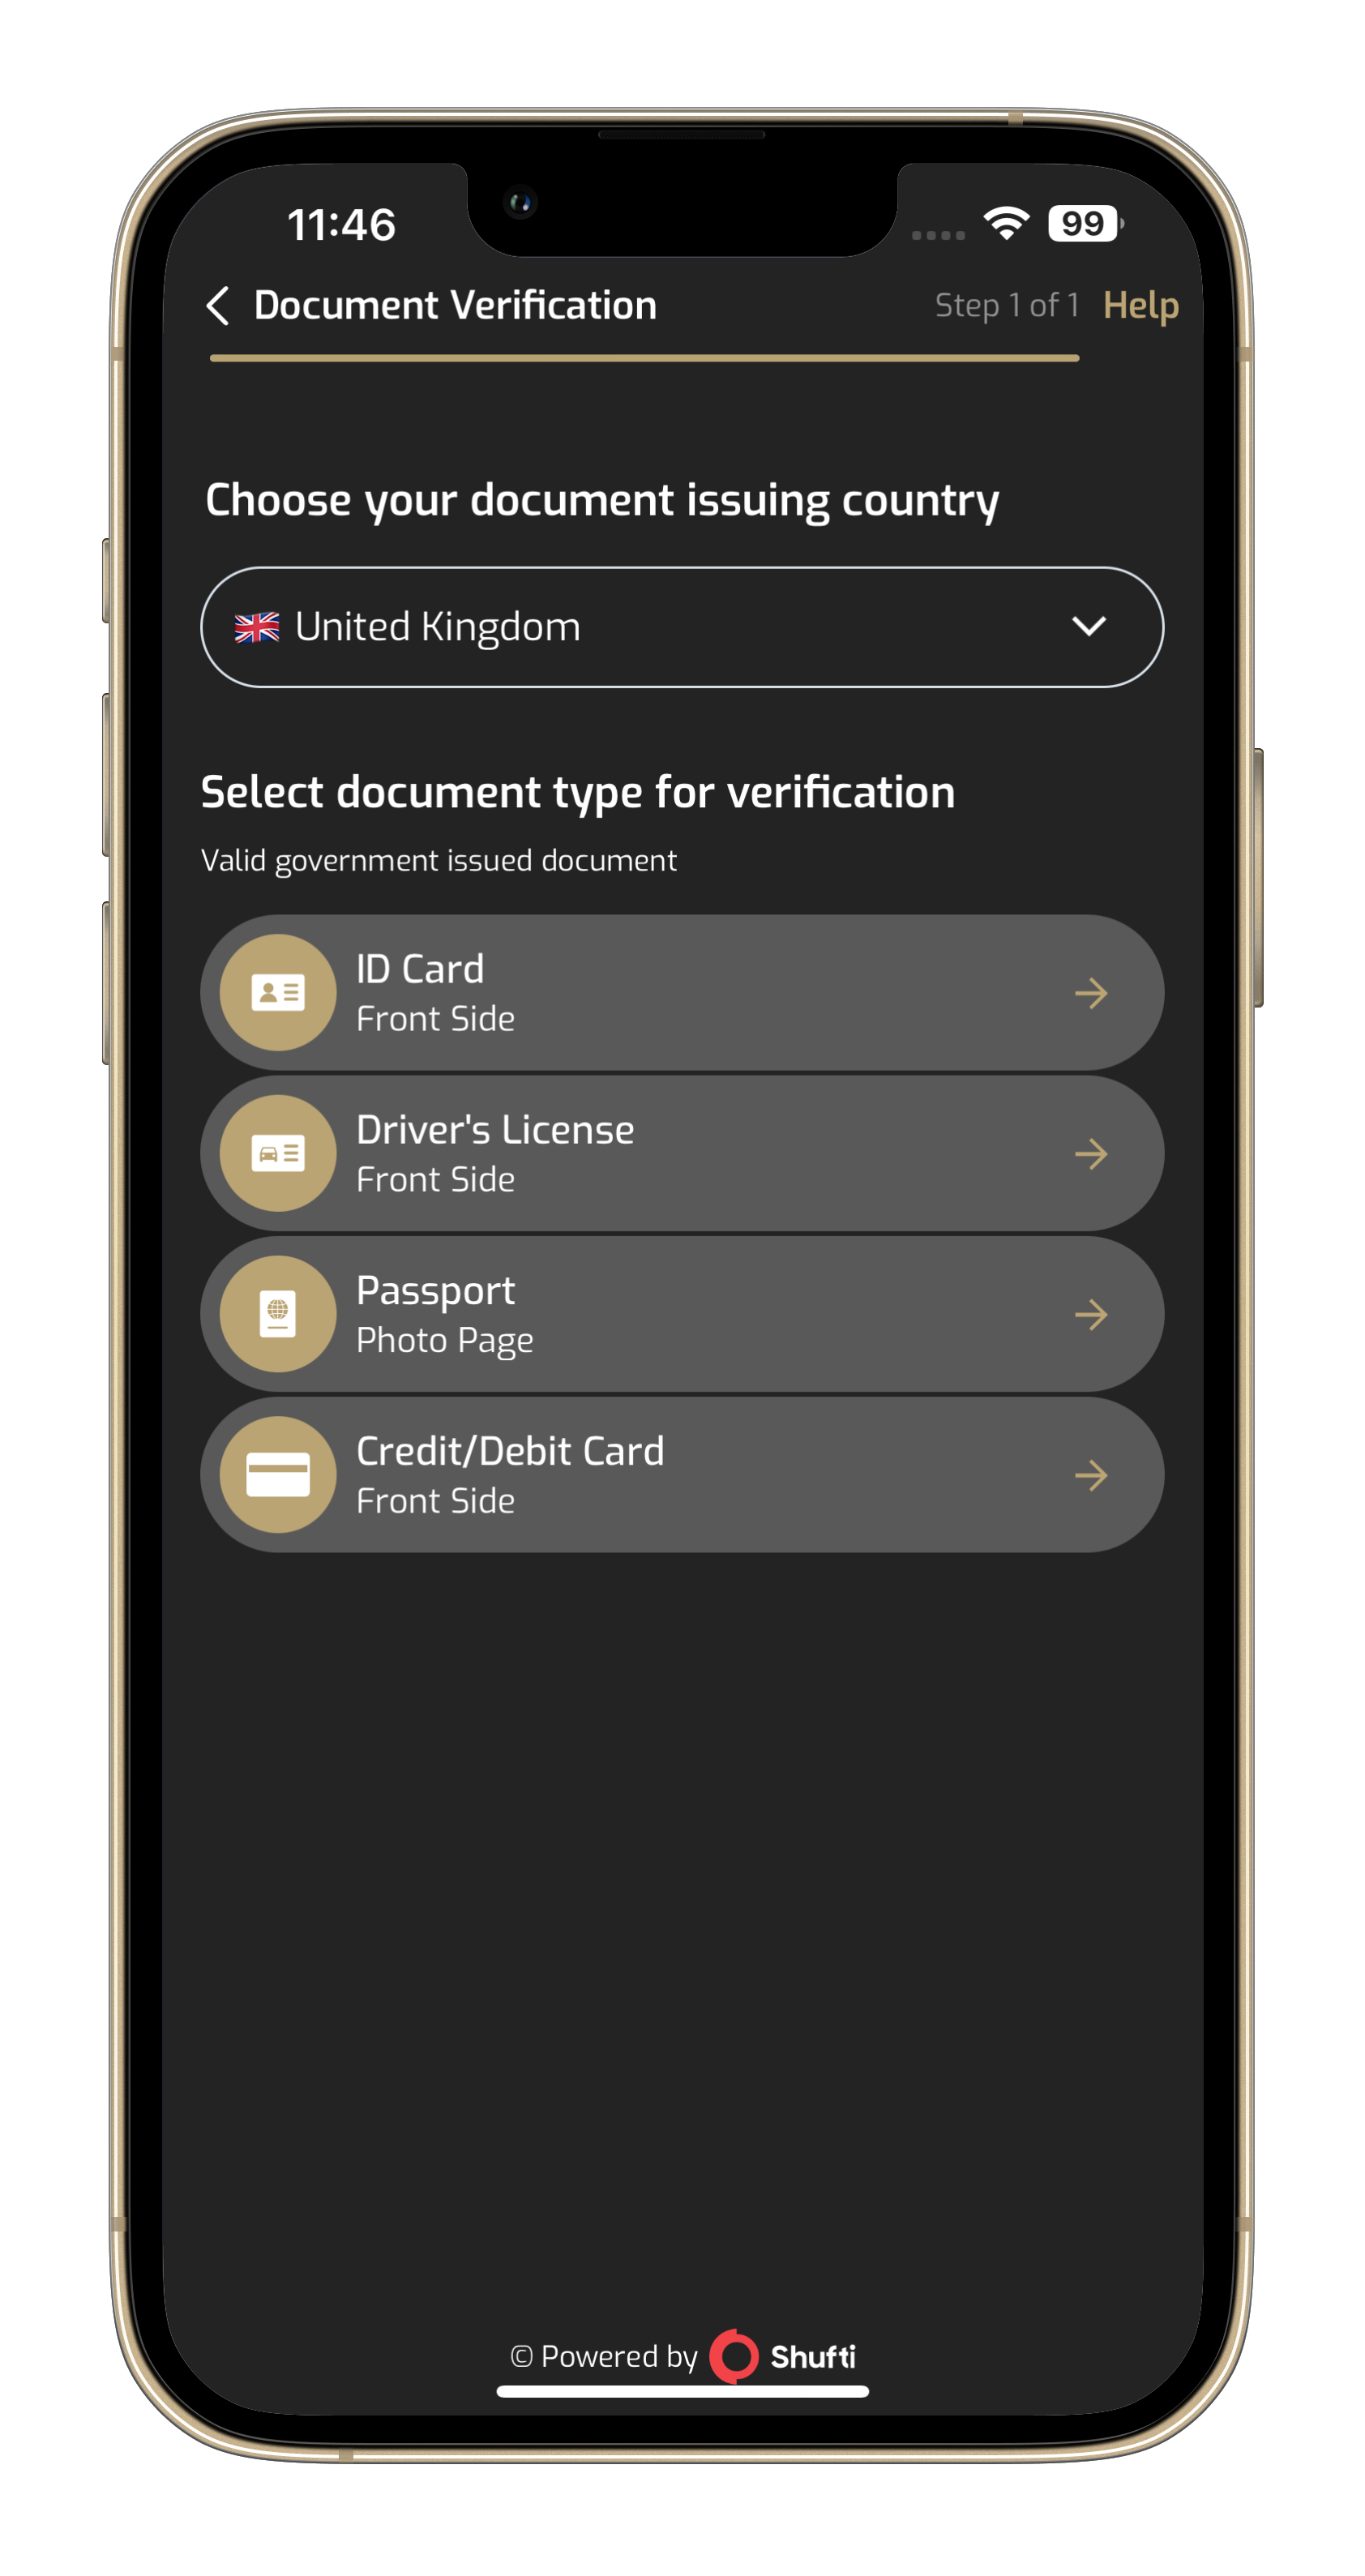
Map<String,Object> configObject = {
    "icon_color": "#XXXXXX",
    "theme_background_color": "#XXXXXX",
    "theme_color": "#XXXXXX",
    "card_background_color": "#XXXXXX",
    "theme_light_color": "#XXXXXX",
    "loader_color": "#XXXXXX",
    "loader_text_color": "#XXXXXX",
    "background_color": "#XXXXXX",
    "stroke_color" : "#XXXXXX",
    "dark_mode_enabled": true
    };
Localization
Shufti offers users the capability to customise the SDK text according to their preferred language. Merchants can modify the SDK language by specifying the language code in the country parameter within the main request object, such as "language": "en"
NFC verification
Near Field Communication (NFC) is a set of short-range wireless technologies. NFC allows sharing of small data payloads between an NFC tag and an NFC-supported device. NFC Chips found in modern passports, and similar identity documents contain additional encrypted information about the owner. This information is very useful in verifying the originality of a document. NFC technology helps make the verification process simple, quicker and more secure. This also provides the user with contactless and input less verification. Shufti's NFC verification feature detects MRZ from the document to authenticate NFC chips and retrieve data from it, so the authenticity and originality of the provided document can be verified.
NFC verification for ID Cards, Driving Licenses, and Residence Permits is currently in Beta testing
Installation
Step 1
Add dependency in pubspec.yaml as
dependencies:
  shuftipro_onsite_sdk_nfc: ^1.0.0
Step 2
For iOS, Application Info.plist must contain a Privacy - Camera Usage Description and Privacy - NFC Scan Usage Description key with an explanation to the end-user about how the app uses this data.
Step 3
For iOS, open your Info.plist file as Source Code and add these lines inside the dict tag.
<key>com.apple.developer.nfc.readersession.iso7816.select-identifiers</key>
<array>
  <string>00000000000000</string>
    <string>A0000002471001</string>
    <string>A0000002472001</string>
</array>
Step 4
For iOS, in your Project target, add under the Signing and Capabilities section, tap on Capabilities and add Near Field Communication Tag Reading.For more guidance watch this guided imagehere
Step 5
For iOS, please make sure to add the following post-install hook to your Podfile.
post_install do |installer|
  installer.aggregate_targets.each do |target|
      target.xcconfigs.each do |variant, xcconfig|
      xcconfig_path = target.client_root + target.xcconfig_relative_path(variant)
      IO.write(xcconfig_path, IO.read(xcconfig_path).gsub("DT_TOOLCHAIN_DIR", "TOOLCHAIN_DIR"))
      end
  end

  installer.pods_project.targets.each do |target|
    target.build_configurations.each do |config|
      if config.base_configuration_reference.is_a? Xcodeproj::Project::Object::PBXFileReference
          xcconfig_path = config.base_configuration_reference.real_path
          IO.write(xcconfig_path, IO.read(xcconfig_path).gsub("DT_TOOLCHAIN_DIR", "TOOLCHAIN_DIR"))
      end

      if ['OpenSSL-Universal', 'GoogleMLKit/TextRecognition', 'lottie-ios'].include? target.name
          config.build_settings['BUILD_LIBRARY_FOR_DISTRIBUTION'] = 'YES'
          config.build_settings['IPHONEOS_DEPLOYMENT_TARGET'] = '15.0'
      end
    end
  end
end
Step 6
For Android, go to project > android > app > build.gradle file and add the following
android {
    //Rest of your code
    dataBinding {
        enabled = true
    }
    packagingOptions {
        merge 'META-INF/versions/9/OSGI-INF/MANIFEST.MF'
    }
}
To check NFC supported documents and countries, please clickhere
Nfc verification is allowed only on e-passports under document, document_two and address service only.