How It Works?
Shufti assists clients in gathering crucial user information necessary for onboarding and enhanced due diligence verification. We offer customised forms tailored to their specific business requirements. Additionally, clients have the flexibility to integrate various KYC services to obtain diverse proofs as needed.
Client can either utilise an existing template from Shufti's library of templates or create a new one via Shufti’s back office.
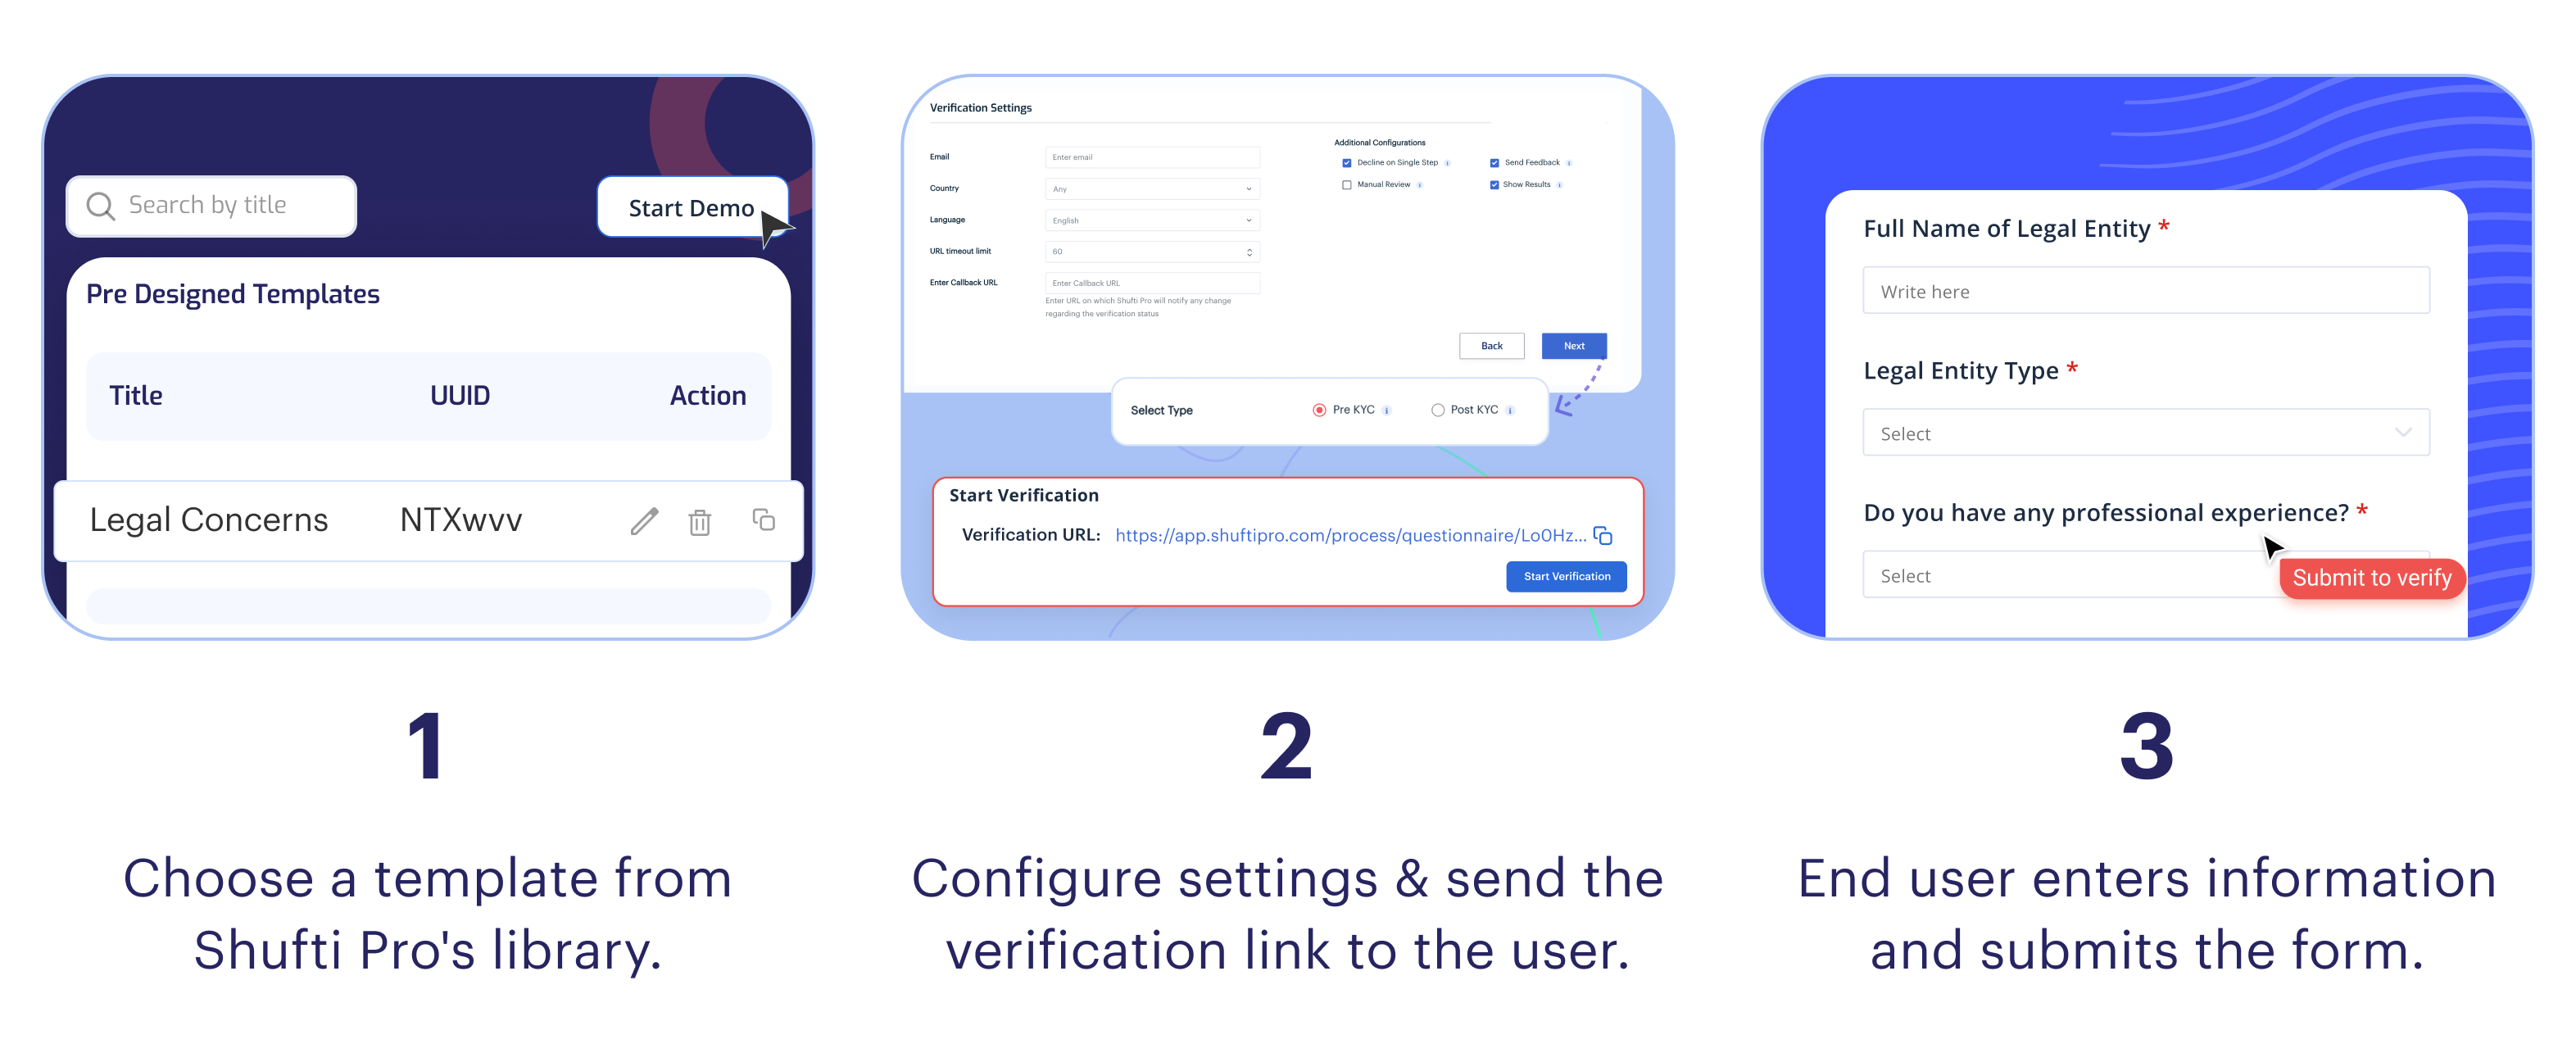
Due Diligence using Existing Templates
Clients can efficiently gather user information using Shufti's customizable due diligence form, selecting up to five forms simultaneously to tailor the data collection according to their needs. Additionally, they have the option to choose between pre and post-KYC workflows for seamless integration with other KYC services like Document and Face Verification.
- Navigate to Product Demo section > Enhanced Due Diligence
- Click on the Start Demo button to start using an existing Due Diligence Form
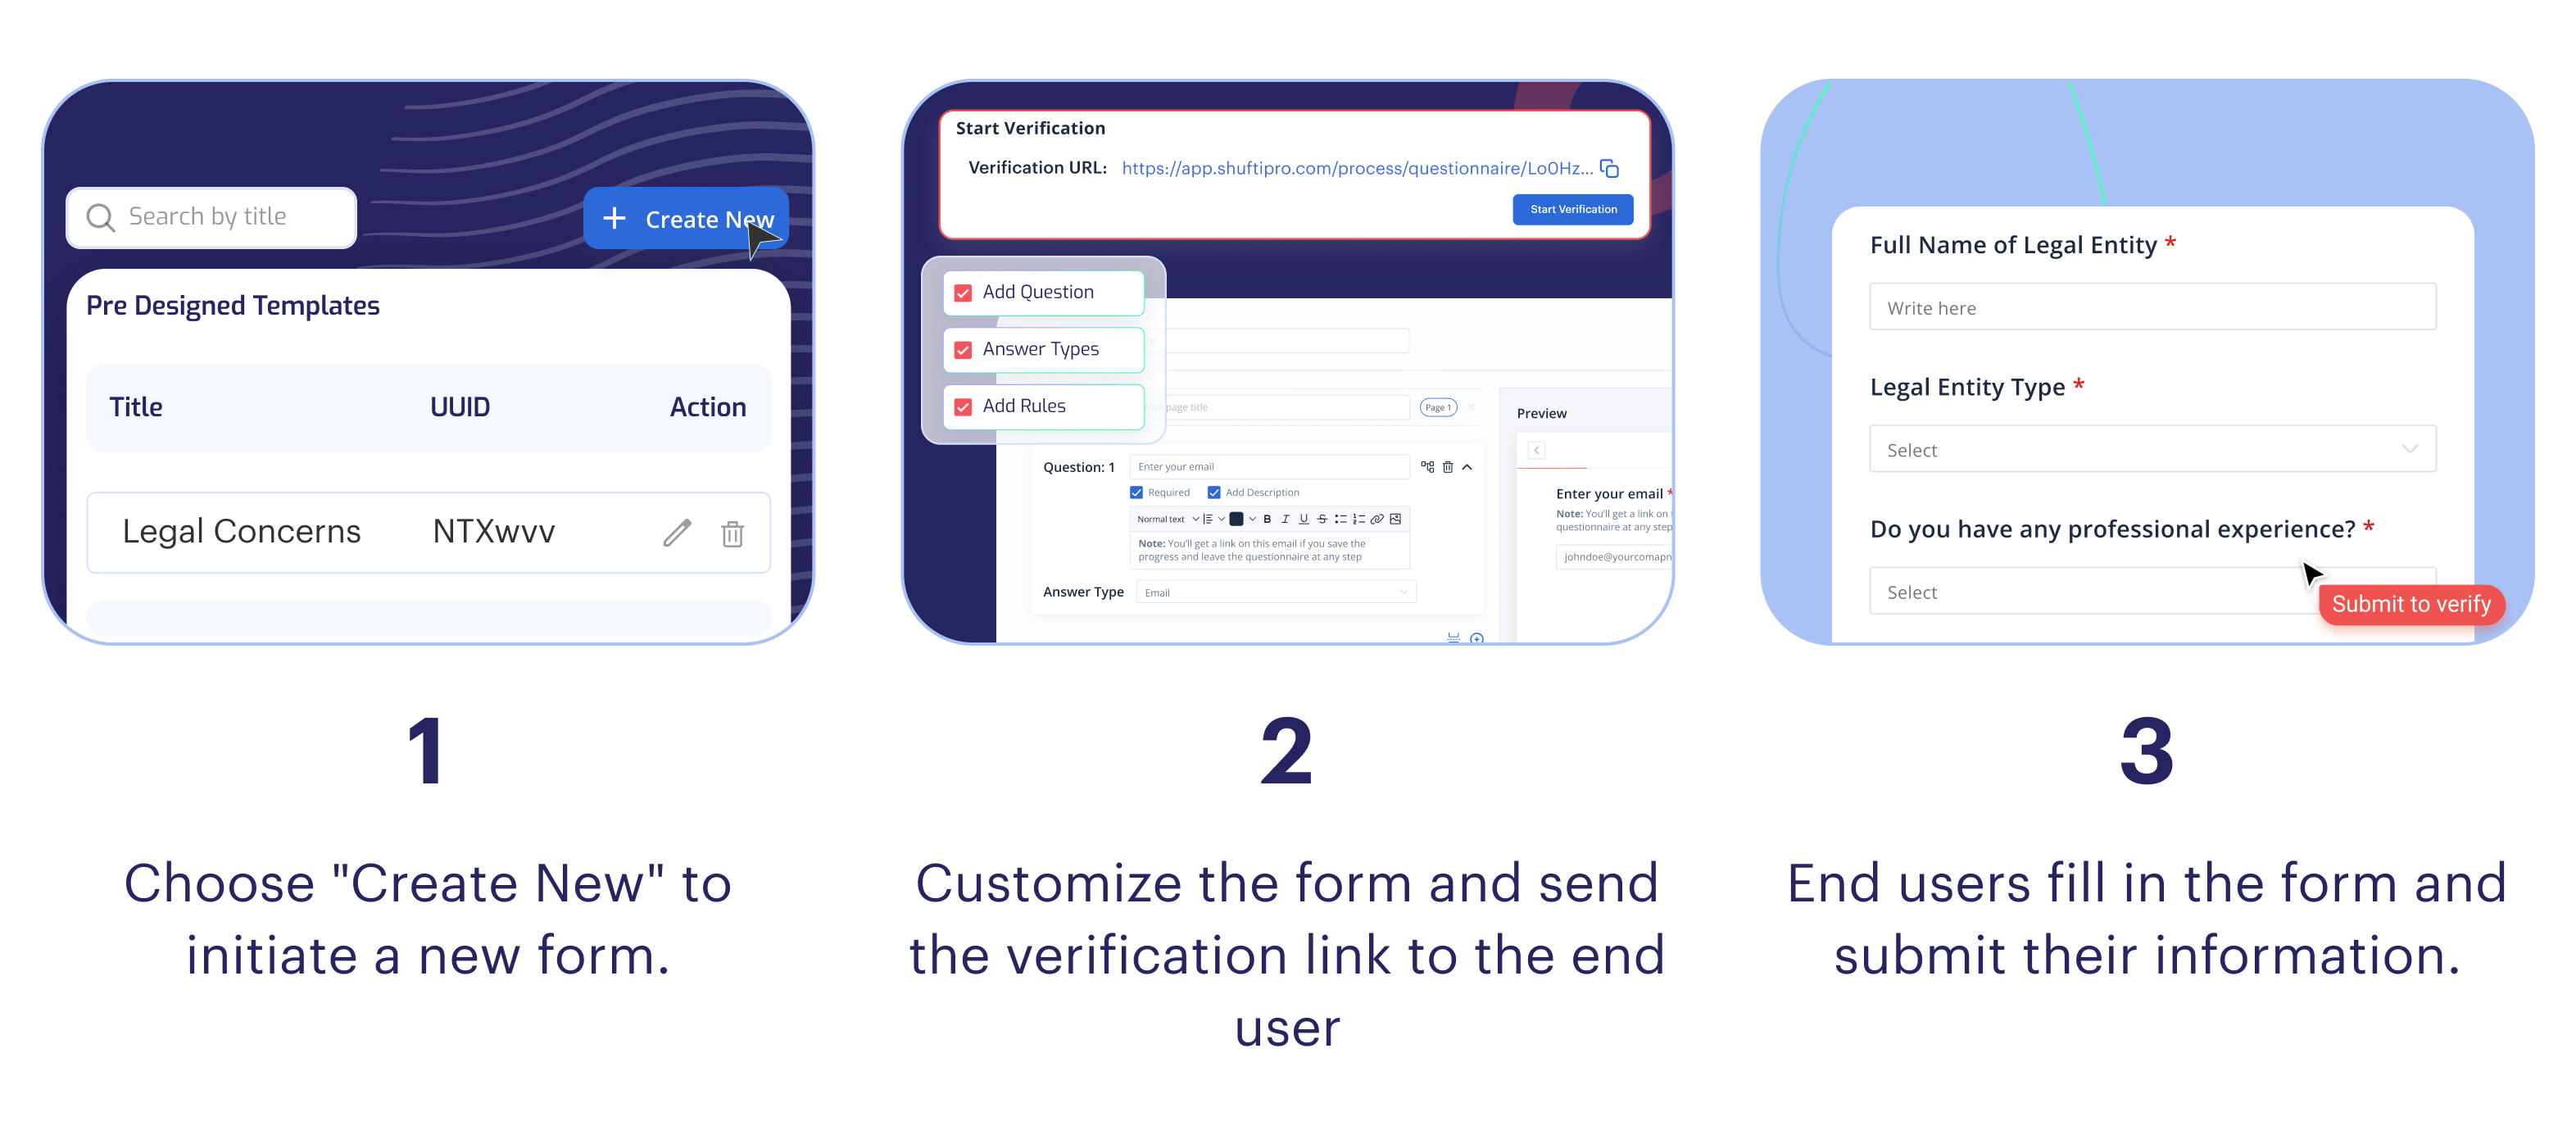
Creation of new Due Diligence Form
- Navigate to the back office product demo section > Enhanced Due Diligence > Create New
- A new page will open, where you can set the title & description of the form.
- Going forward, you have the flexibility to create multiple questions within a single form tailored to your specific needs.
- Client can implement page and question rules to direct users to specific questions and KYC flows according to their preferences.
- Finally the form can be saved and used for collecting user data.
Due Diligence Form can only be created through Shufti's BackOffice.
Add Question
You can add as many questions as you need, depending on your business requirement.
By default question limit in each due diligence form is set to 20. This can be updated by contacting the Shufti's support team at [email protected].
To add questions follow these steps:
- Default Question: Upon form creation, a default question appears. Client can modify it, but keeping it is advised for saving progress if the end user leaves the form without submitting it.
- Add new Questions: Click the plus sign next to the page title to add new questions.
- Question Title: Write a title for each new question you add.
- Required Setting: Choose if the question is 'required' or optional and add a description as needed.
- Answer Type: Select the preferred answer format (e.g., Text, Float, Paragraph).
- Save Form: Click 'Proceed' to save your custom due diligence form.
Answer Types
Answer types allow you to collect the specific data to be collected from the end user according to your business requirements:
| Field | Description |
|---|---|
| Text | Single-line input for brief text, like names. |
| Dropdown | Compact menu for choosing one from many options. |
| Radio Buttons | Select one option from multiple choices. |
| Field for email addresses, with format validation. | |
| Upload File | Allows file uploads, such as documents or images. |
| Integer | For whole number inputs only. |
| Float | Accepts numbers with decimals. |
| Linear Scale | Numeric scale for ratings or evaluations. |
| Date | Date selection, often with a calendar interface. |
| Paragraph | Multi-line text box for longer responses. |
| Countries List | Dropdown list of countries for geographic selection. |
Add Rules
You can control the flow of due diligence form by adding rules on each question or page. In the Due Diligence Form, two types of rules are employed to achieve the desired workflow:
- Question Rules: Implement logic-driven visibility for questions or options based on end user responses. This feature enables you to tailor the form dynamically, showing or hiding additional elements according to the answers provided by the end user.
- Page Rules: Set up custom navigation within the form based on end user inputs. Page Rules allow you to direct end users to specific questions or sections of the form, ensuring a personalized and relevant experience tailored to their responses.
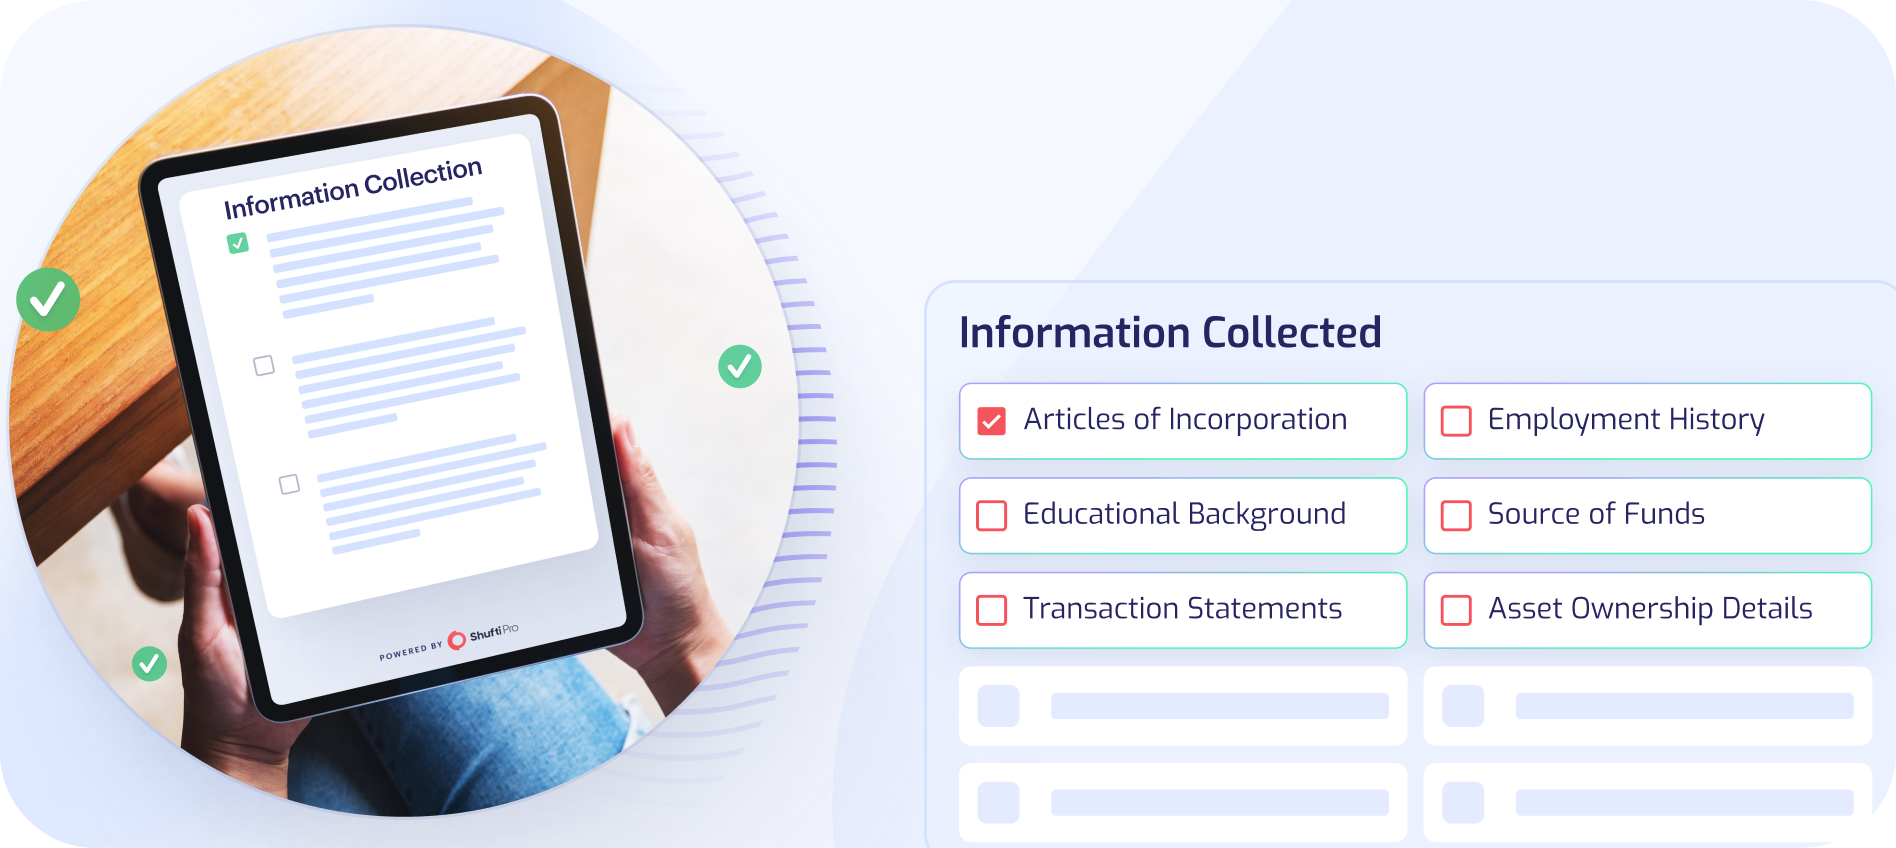
Information Collected
Common information collected from the end user using the form is as follows:
- Personal and Contact Information
- Employment History
- Educational Background
- Source of Funds
- Transaction Statements
- Asset Ownership Details
- Beneficial Ownership Information
- Business Registration Certificates
- Articles of Incorporation
- Business Licenses
Once a form is used for verification, it cannot be edited or updated. To make changes, create a duplicate and then edit/update the due diligence form.