How It Works?
The Shufti Pro e-Signature service allows you to instantly send documents to multiple recipients simultaneously, enabling them to sign from anywhere using their devices. By providing a secure and efficient way to obtain signatures, our service enhances flexibility and security while mitigating the risks associated with traditional paper-based signatures.
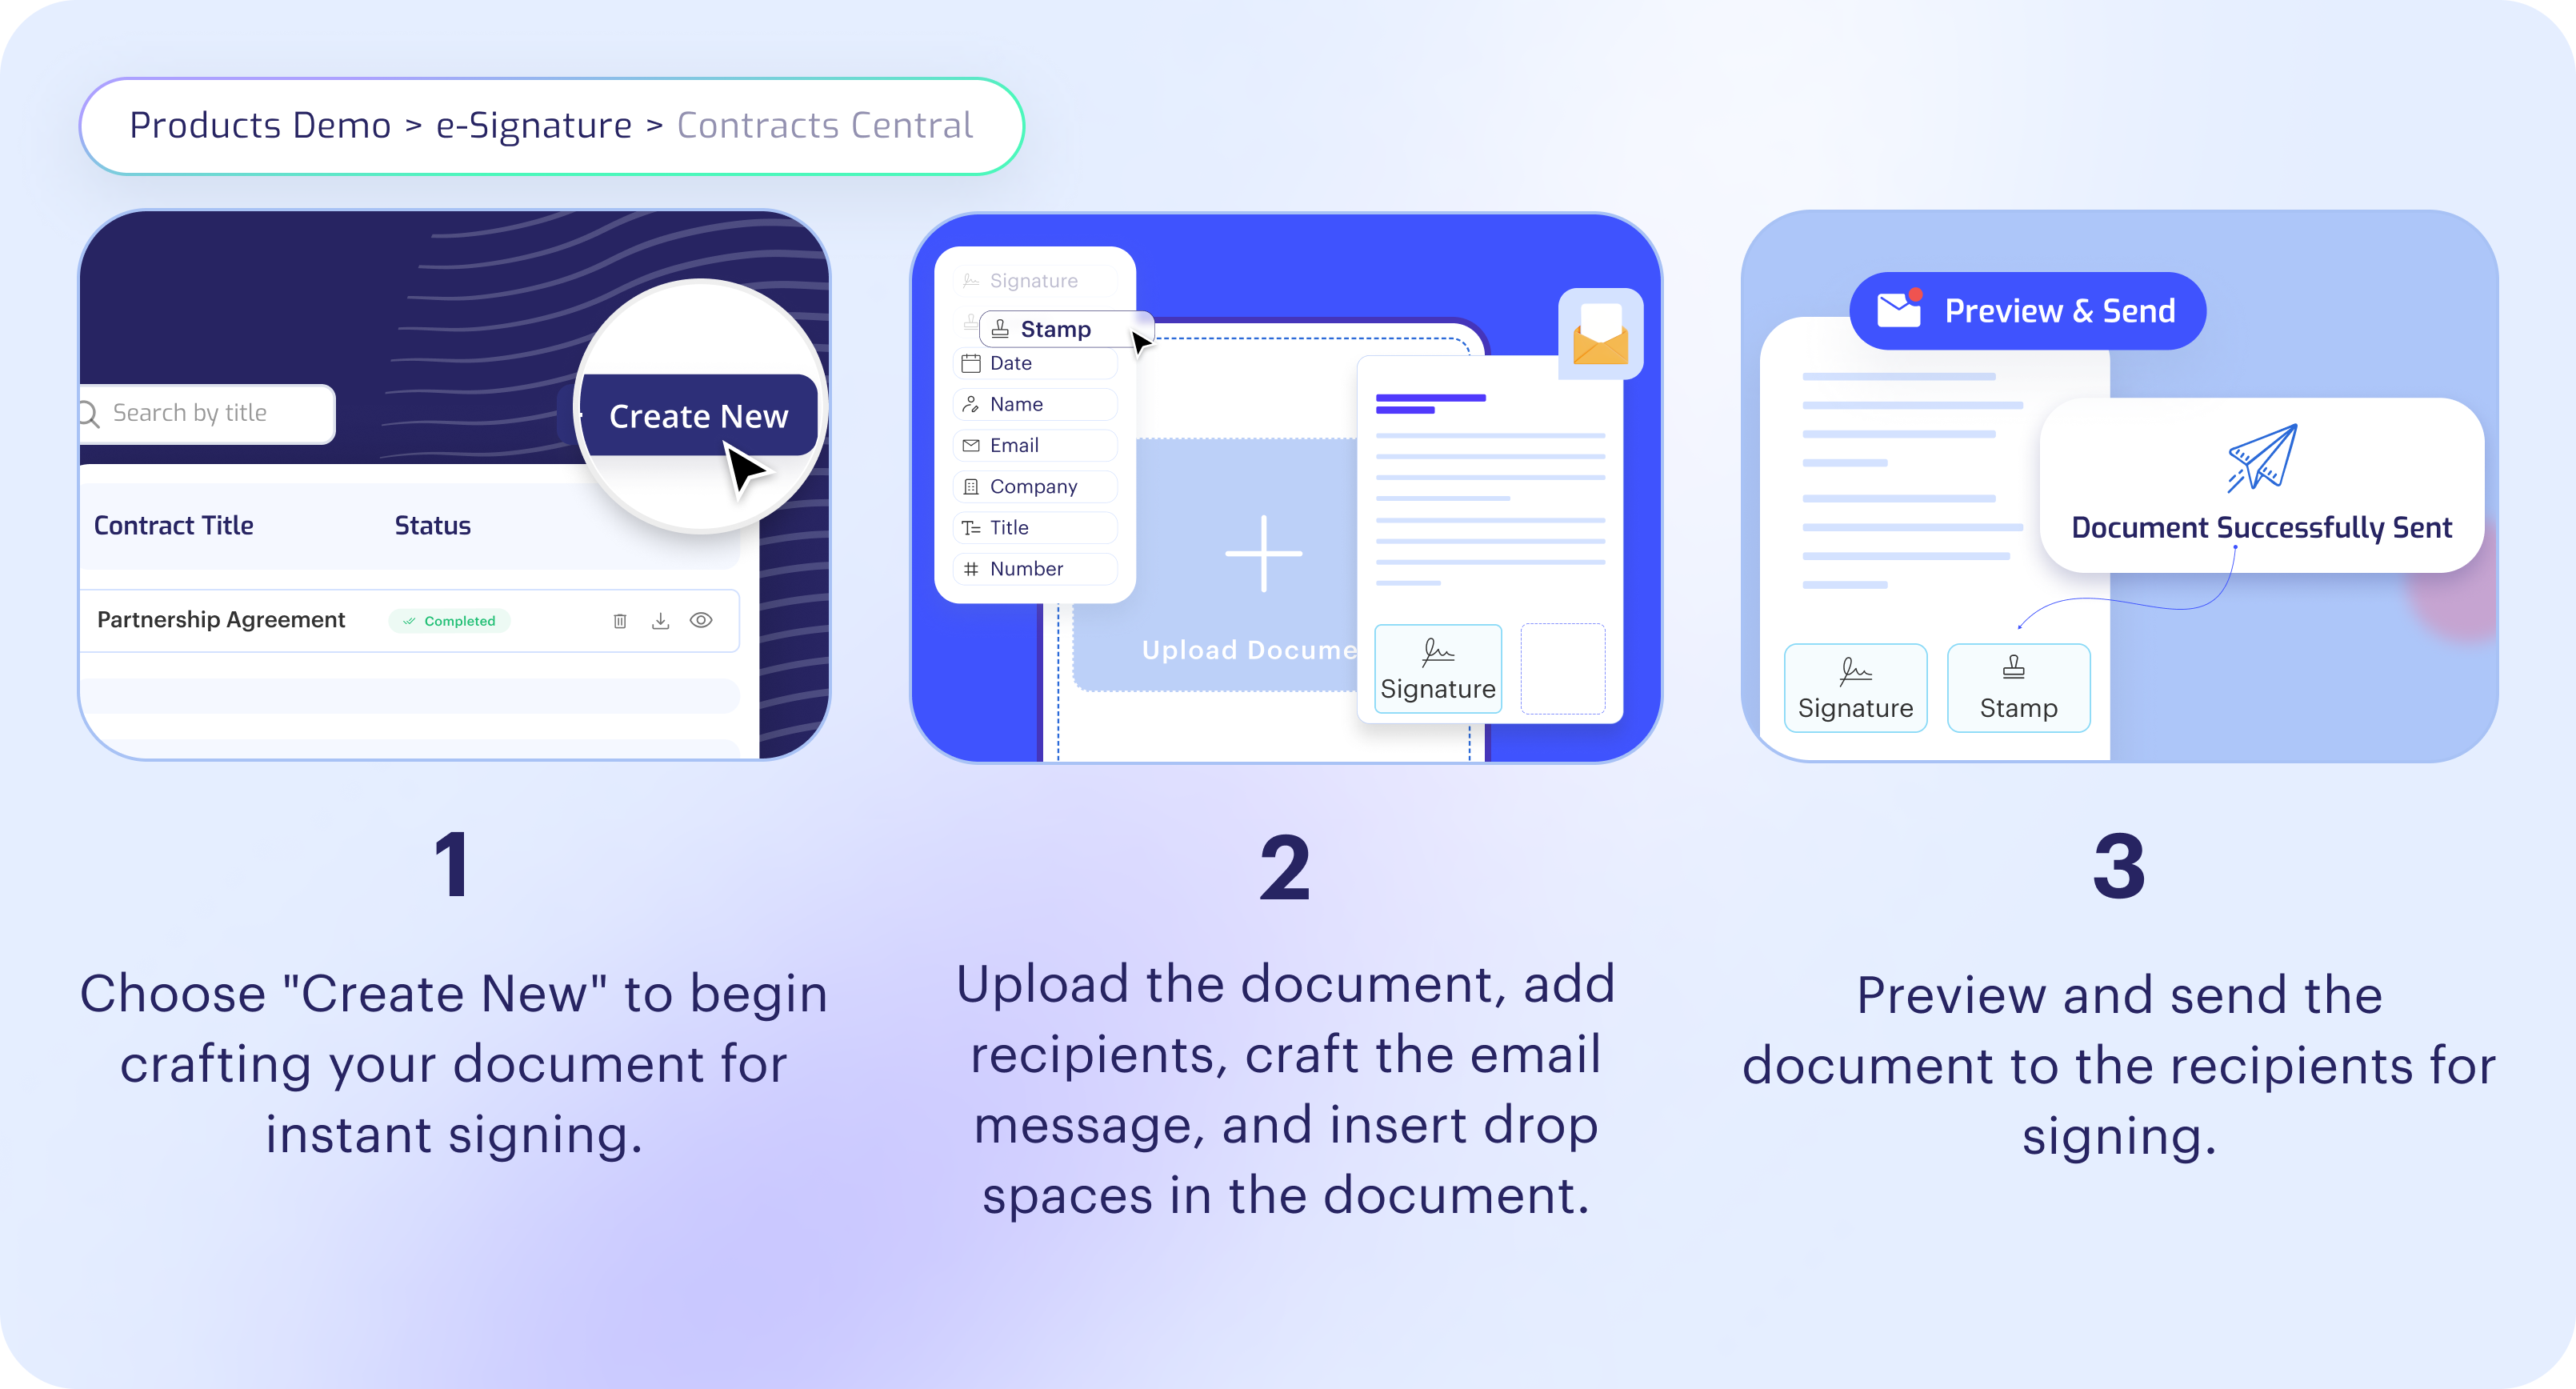
Quick Document Signing
Clients can instantly send a document for signatures using these simple steps:
- Navigate to e-Signature: Go to Product Demo and select e-Signature.
- Initiate New Contract: Clients can start the contract creation process by selecting the option Create New from the contracts central.
- Upload Document: Shufti Pro e-Signature supports a variety of file formats, including PDF, JPG, PNG, or JPEG. Upload files from your local device or select a ready-to-use template from the template library.
- Add Recipient & Assign Action: Specify who receives your document and what action you want them to take. [Need to Sign or Receive a Copy]
- Write Email Message: Compose a personalized email message for recipients to provide context for the document.
- Add Drop Spaces: For each recipient, add drop spaces to your documents to gather the desired electronic signatures and other information, such as name, date signed, email, and stamp.
- Set Expiration Time: Specify the expiration date for the signature request, after which the recipient will no longer have access to sign the contract.
- Preview & Send: Review your field setup and send the contract to your recipients.
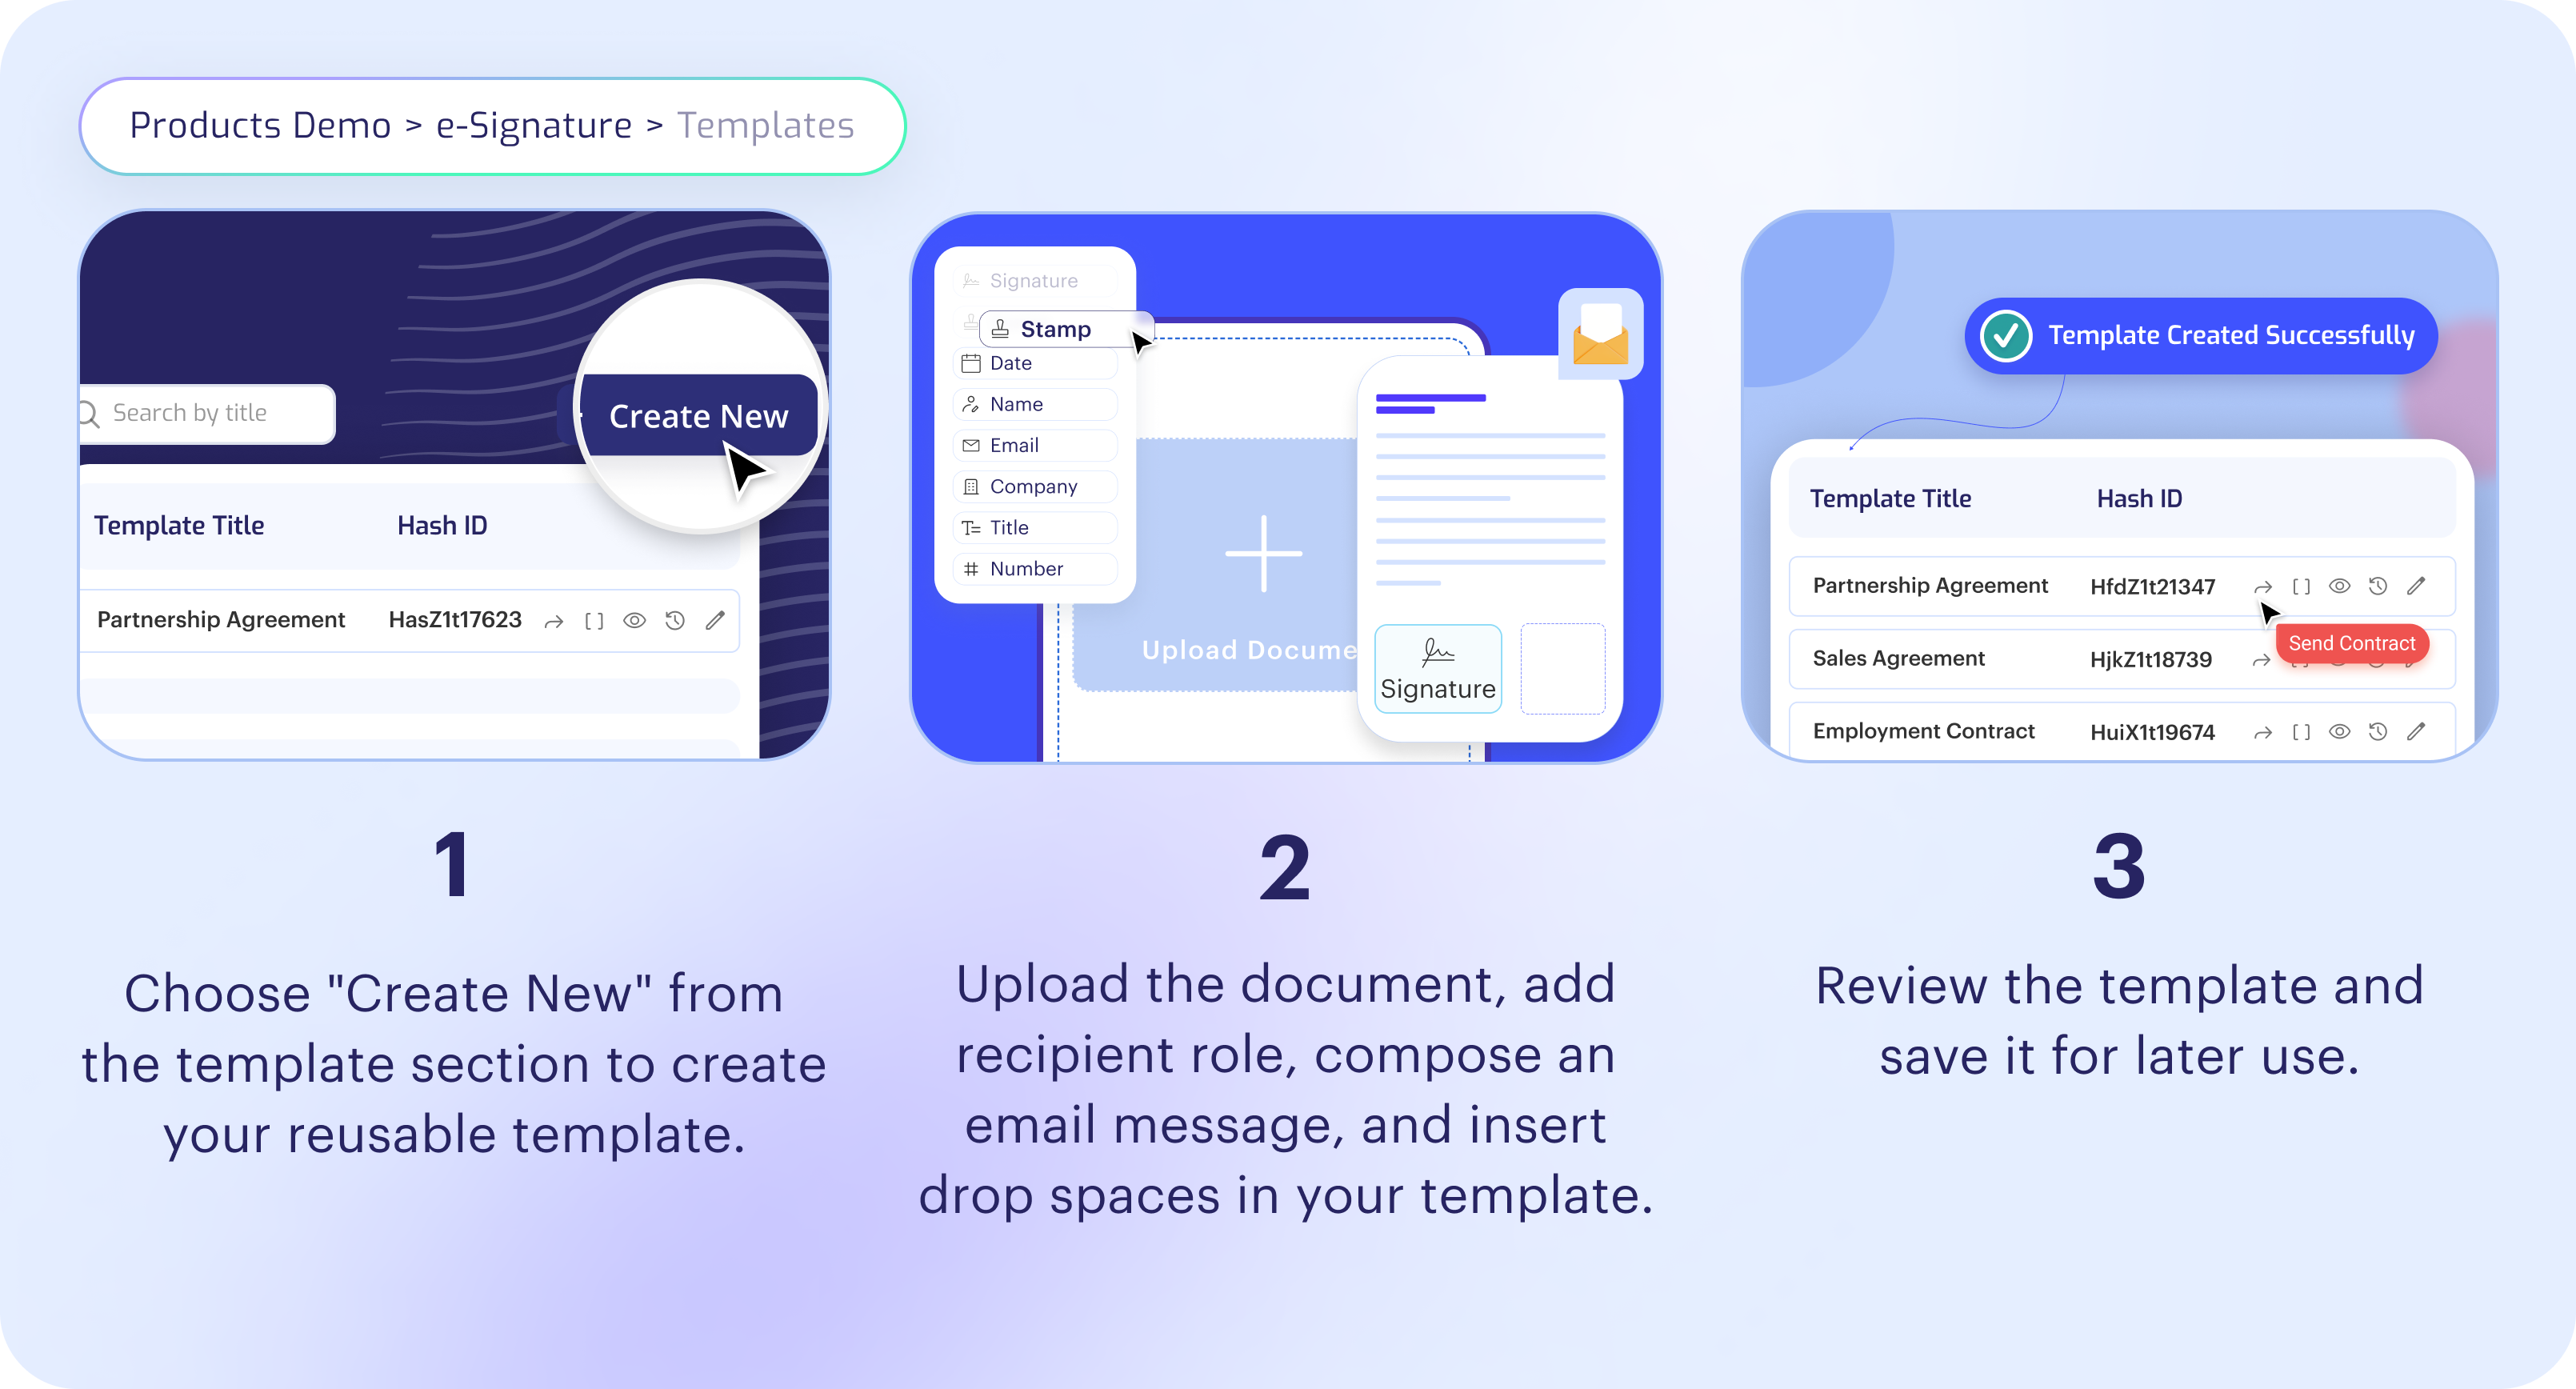
Creation of Reusable Template
Clients can create a customised reusable template by following these simple steps:
- Navigate to e-Signature: Go to Product Demo and select e-Signature > Templates.
- Create New Template: Clients can start the template creation process by selecting the option Create New from the templates section.
- Upload Document: Shufti Pro e-Signature supports a variety of file formats, including PDF, DOCX, JPG, PNG, or JPEG. Upload files from your local device or select a ready-to-use template from the template library.
- Add Role & Assign Action: Specify the roles of the recipients and what action you want them to take. [Need to Sign or Receive a Copy]
- Write Email Message: Compose a personalized email message for recipients to provide context for the document.
- Add Drop Spaces: For each role, add fields to your documents to gather the desired electronic signatures and other information, such as name, date signed, email, and stamp.
- Save Template: Review your field setup and save the template for later use.
- Use Template: Choose your desired template, give it a title, provide recipient information (name & email), specify expiry details, and send it to the recipients.
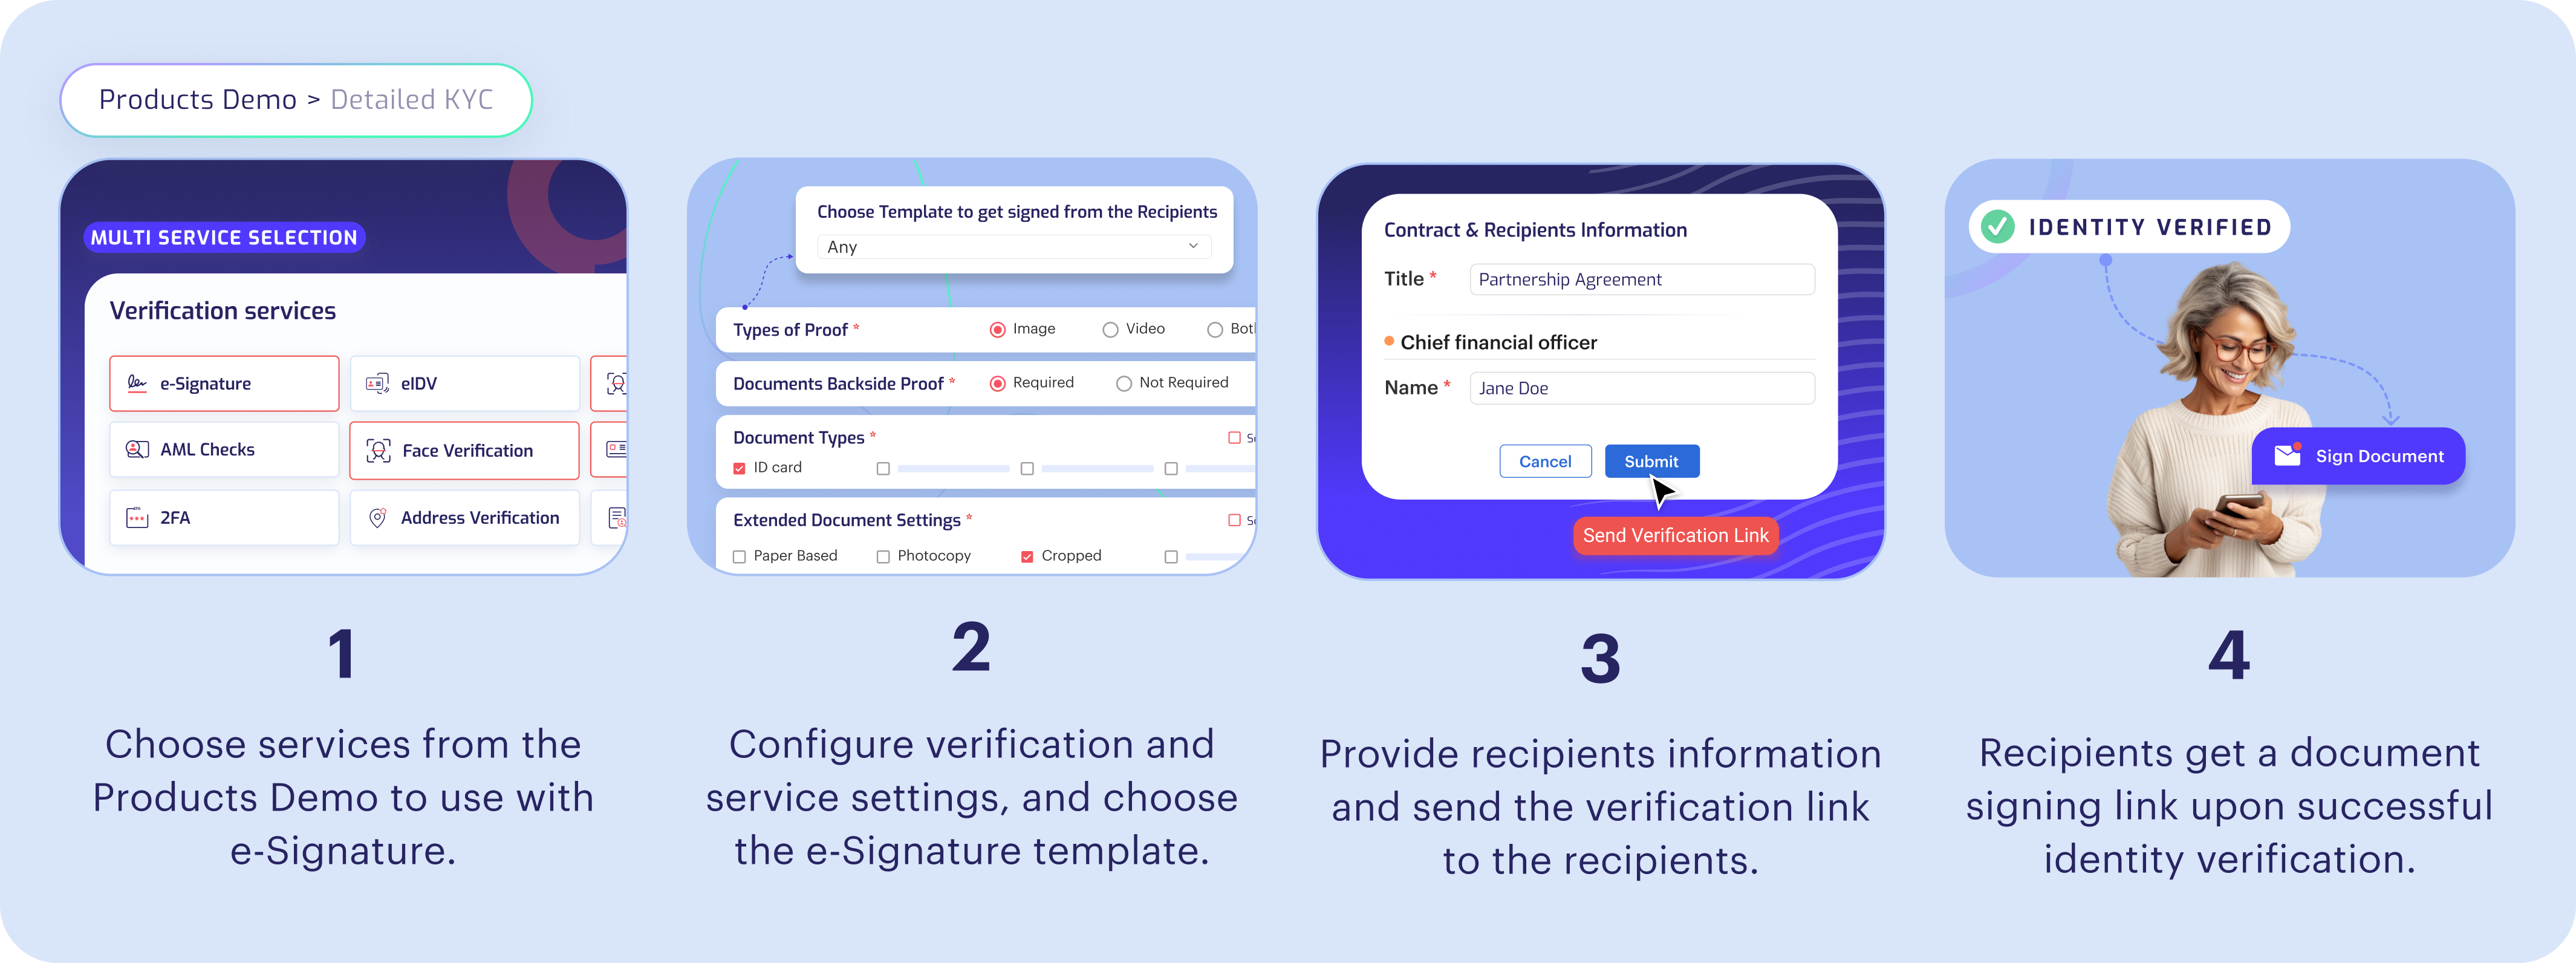
e-Signature with Signer IDV
Verify the identity of the signers by configuring e-Signature with identity verification services by following these simple steps:
- Navigate to e-Signature: Go to Product Demo > Detailed KYC.
- Choose Services: Clients are required to choose their preferred KYC services to pair with e-Signature from available options including Document Verification, Face Verification, AML, and Two-Factor Authentication (2FA) either separately or in combination.
- Configure Verification Settings: Clients can configure the verification settings for each selected service.
- Select e-Signature Template: Clients are required to select their preferred e-Signature Template, give it a title, provide recipient information (name & email), and set the document expiry date.
- Send Identity Verification and Document Signing Link: Once the verification settings are configured and document information is added, send the identity verification link to recipients. Upon successful verification, they will receive the document signing email.
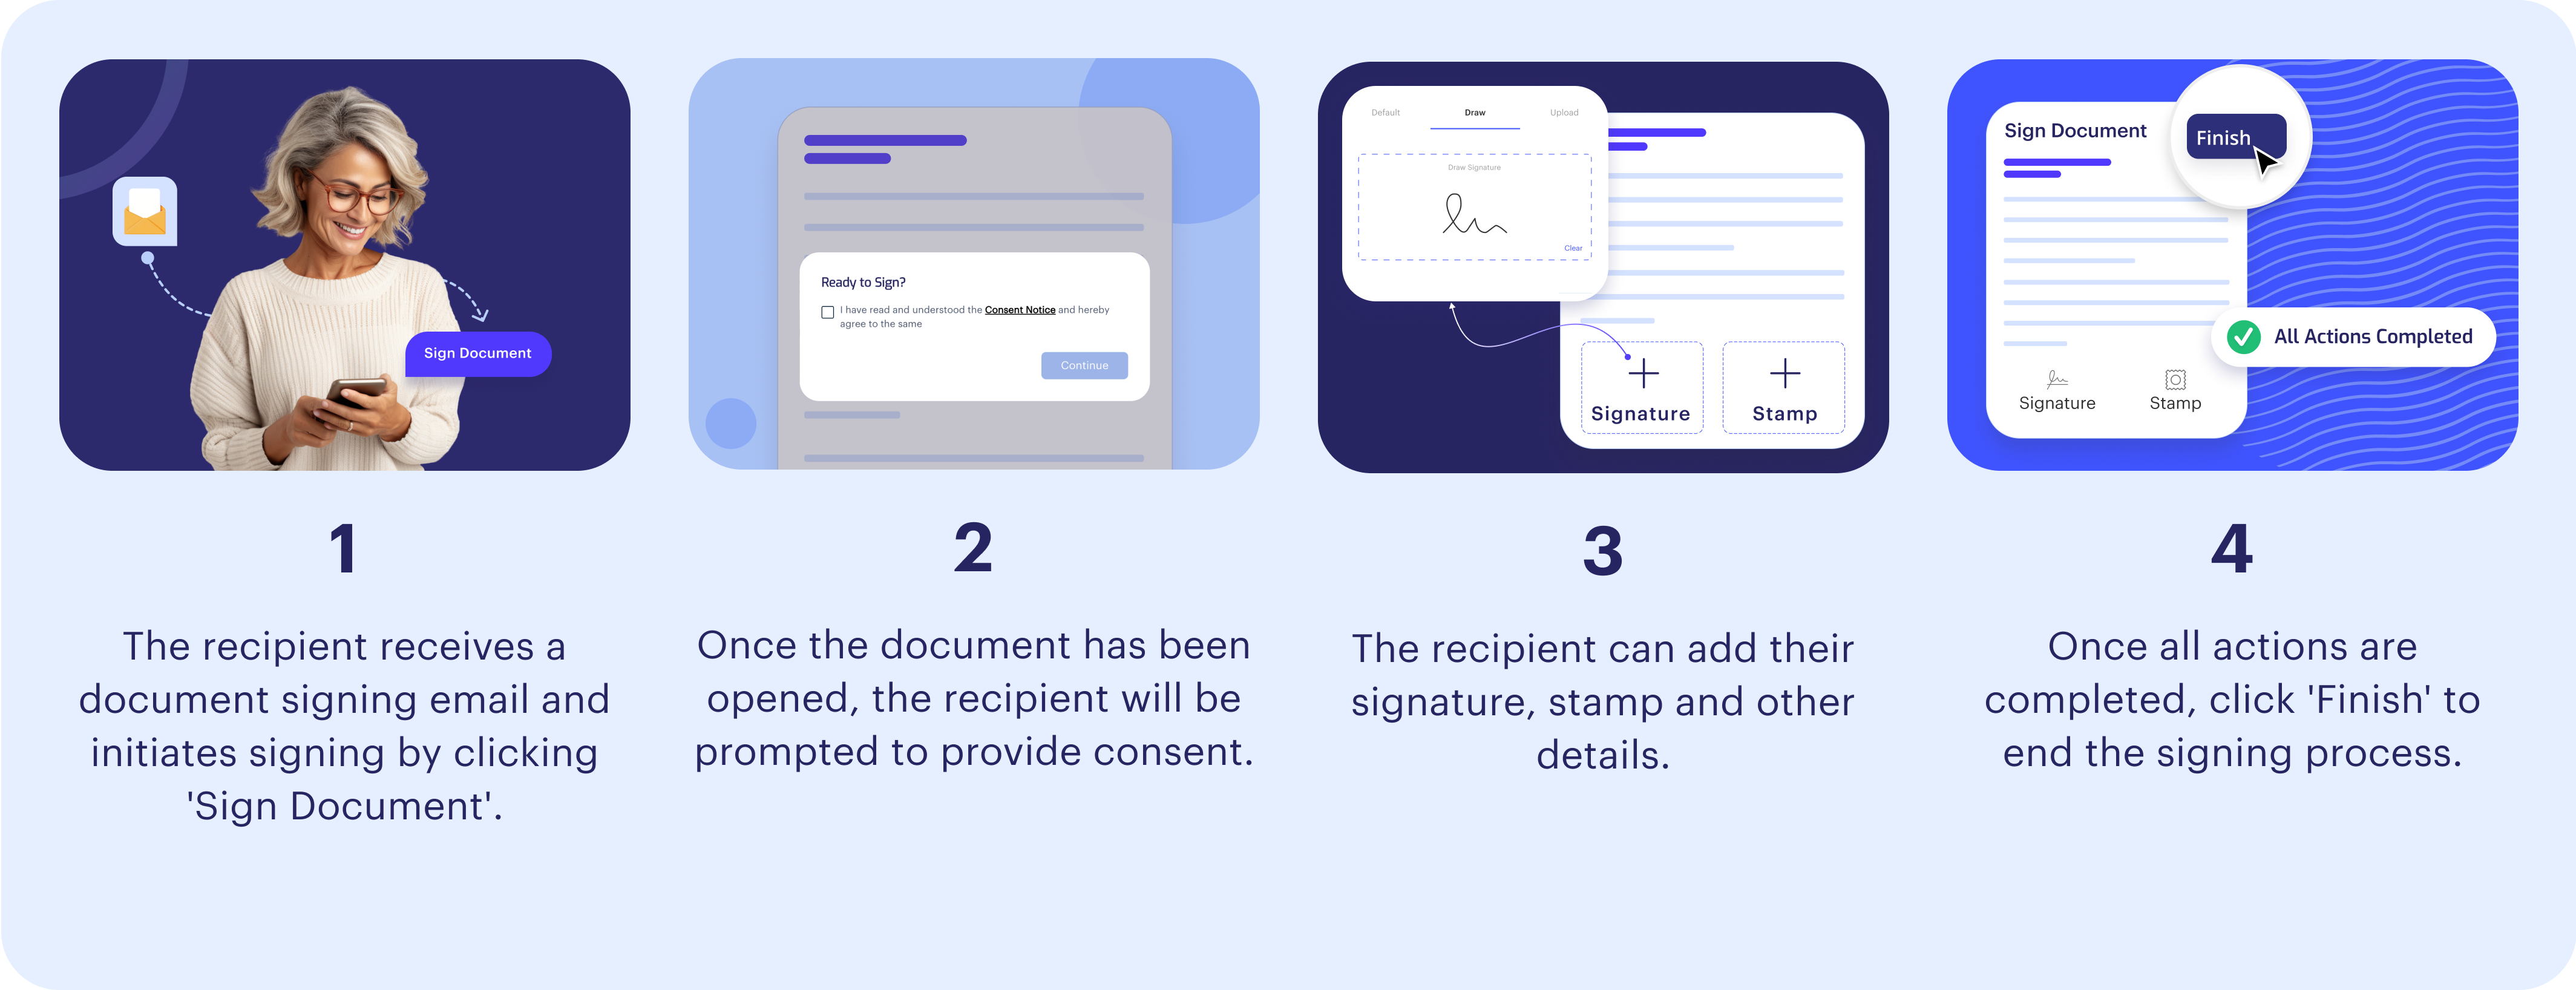
Recipient Flow
Recipients receive a secure invitation by email to review and sign documents electronically, ensuring a smooth and efficient signing experience. Here's how recipients sign the document:
- Document Signing Invitation: Shufti Pro sends an invitation email to each recipient. This email typically includes a link to the document, and a summary of what action needs to be performed.
- Signing Consent: Recipients provide signing consent to access the document for signing.
- Signing a Document: The recipient locates the signing fields and electronically signs the document using various methods supported by our service. Supported Signature Method
- Complete Signing: Once all required fields are signed, the recipient submits the document. Shufti Pro records the completion time and signature details for audit purposes.
- Signing Notification: A notification email will be sent to the sender informing them that the document has been signed by the recipient.
- Signed Document Copy: Upon completion of signing, recipients can obtain a copy of the signed document that contains the signatures of all recipients along with the Signature Certificate.
- Signature Certificate: The signature certificate contains sender, recipient, and document details, providing insights into all signing actions (sender initiation, recipient viewing, and completion) for your records and audit purposes.
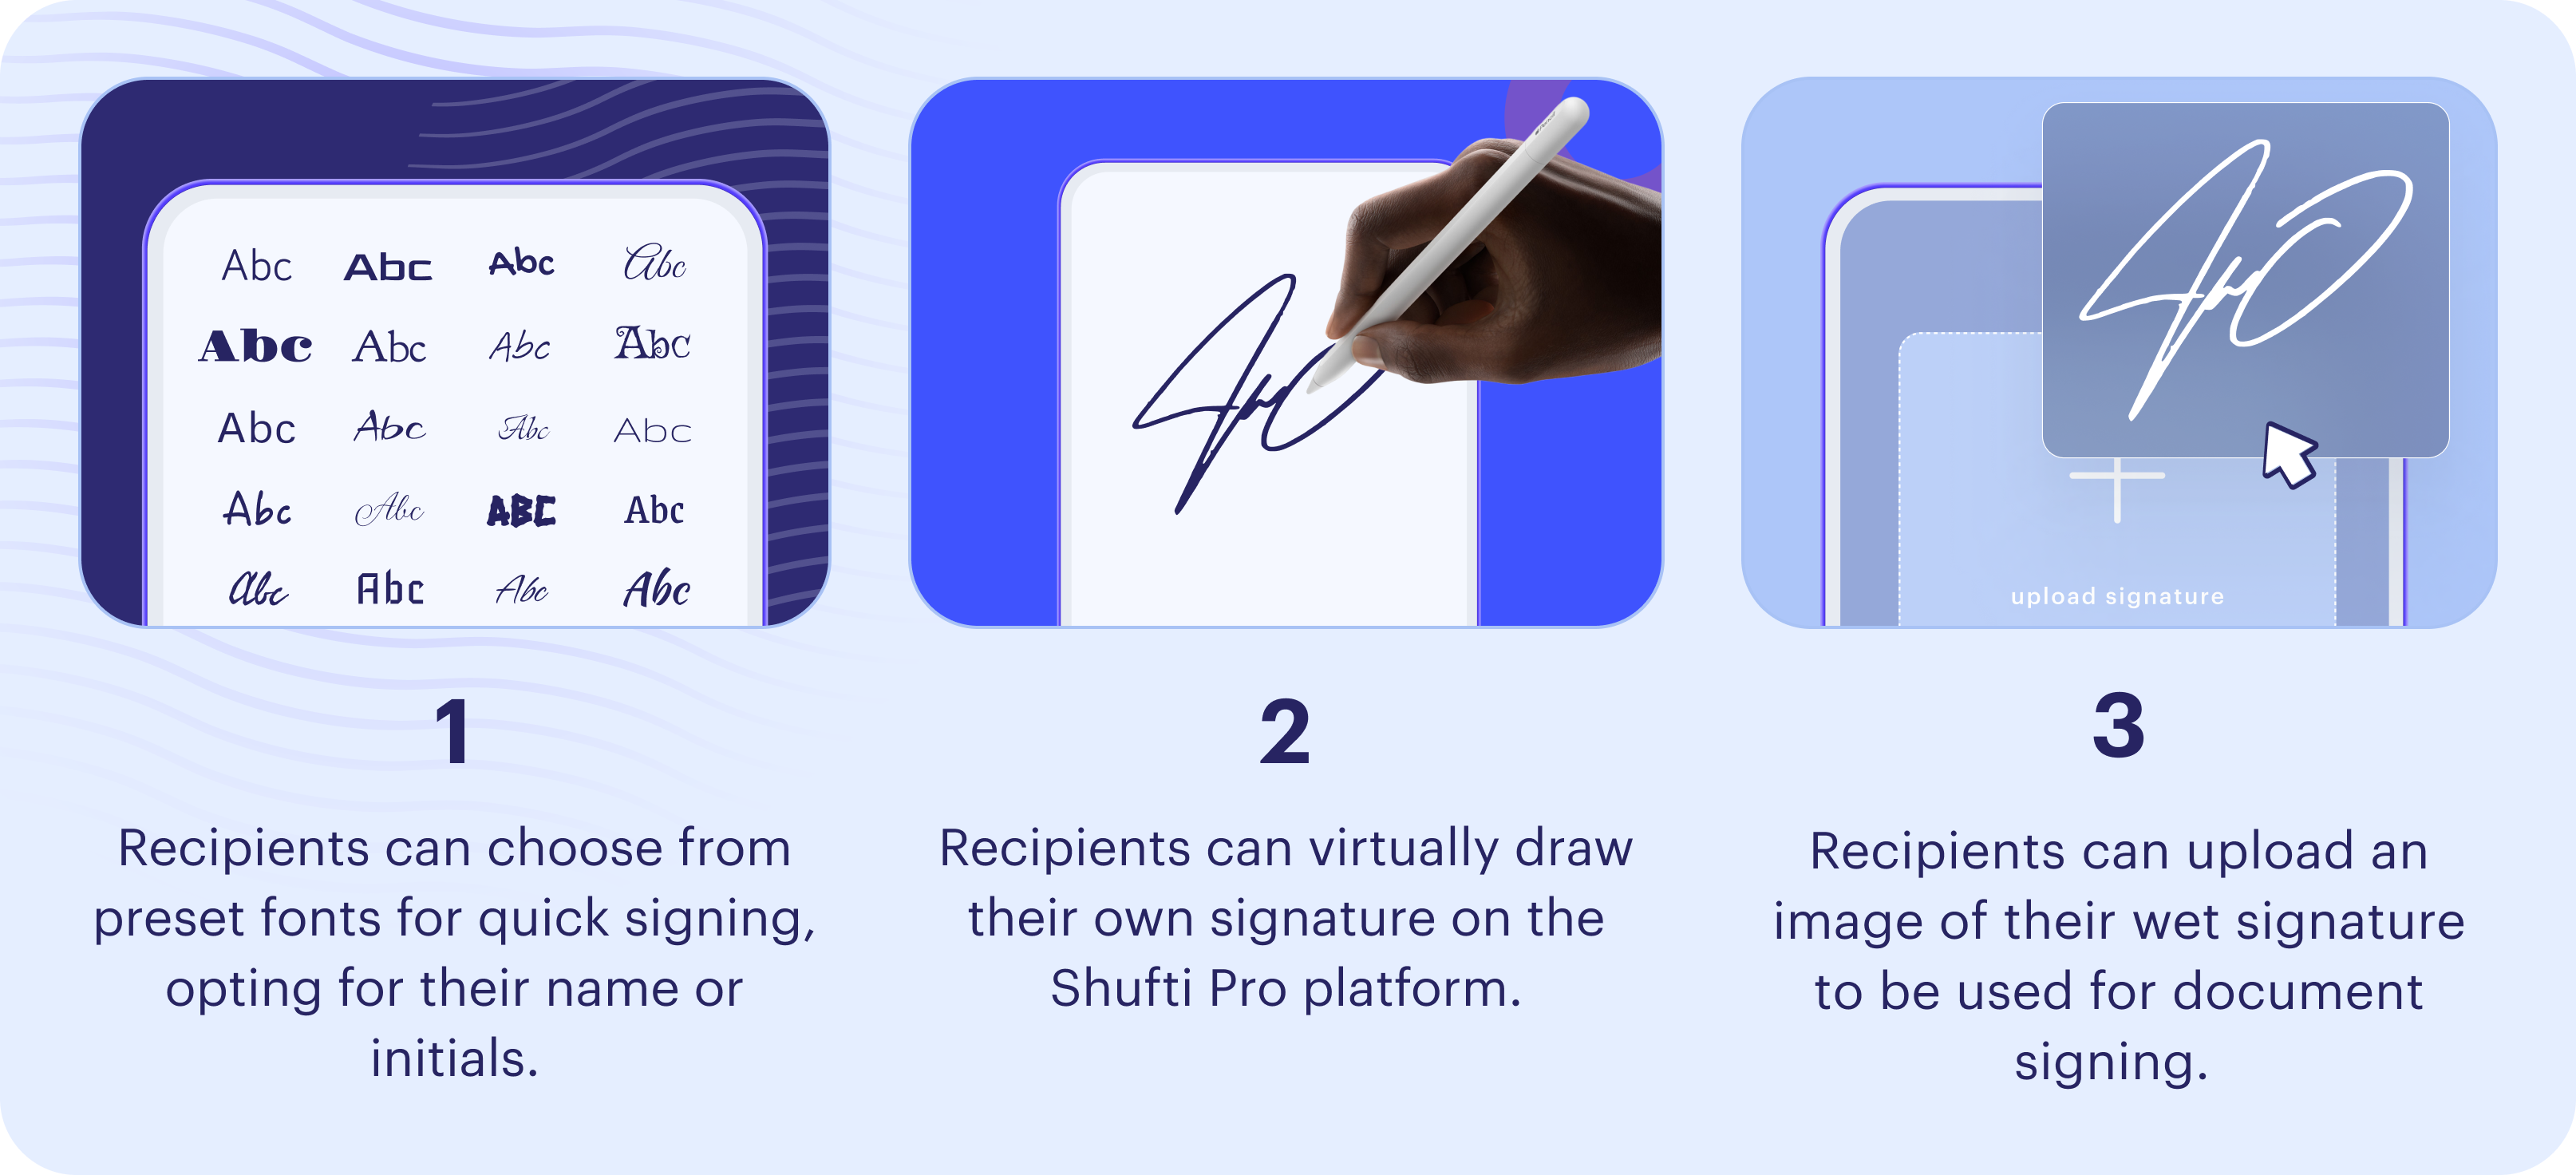
Supported Signature Method
Recipients can employ various methods to add their signatures to documents.
- Pre-set fonts Signatures: Recipients can choose from a library of pre-defined signatures . This option is ideal for frequently used or standardized signatures.
- Uploaded Signature Image: Recipients can upload an image of their wet signature (physical signature on paper) for electronic document signing. This image file should be in a commonly supported format (e.g., PNG, JPG).
- Signature Draw Pad: Recipients can sign directly on the document by drawing signature in the real-time. The e-Signature service will capture this drawn signature electronically.